ETS2 and ATS map editor background creation
Essentials
To create a background for the editor of ets2 you need three things:
- Image editor
- QGIS
- In-game bg map that have all the world(if you want to make something other than Europe)
I am using GIMP for image editing: Download GIMP
QGIS: Download QGIS Press “Skip it and go to download”
Text editor is a standart win11 notepad
The bg map I am using is Global Background Map SCS style by SaltySeeds06
Getting background image from the mod
To extract the image from the background mod, you need to open it as a zip archive. Just right-click the file and open it as an archive with 7-zip.
Alternatively, you can rename the file by changing .scs extension to .zip, and then open it with standart win11 explorer.
Then you will see this folder structure:
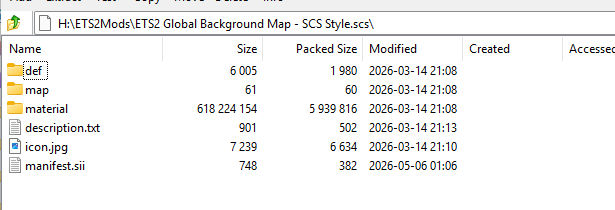
Go to material > ui > map and extract map.dds somewhere you want.
Then open the image editor and convert the image to png. Here’s’ how to do that in GIMP:
Press on File > Open at the top left, and select you dds image from the mod
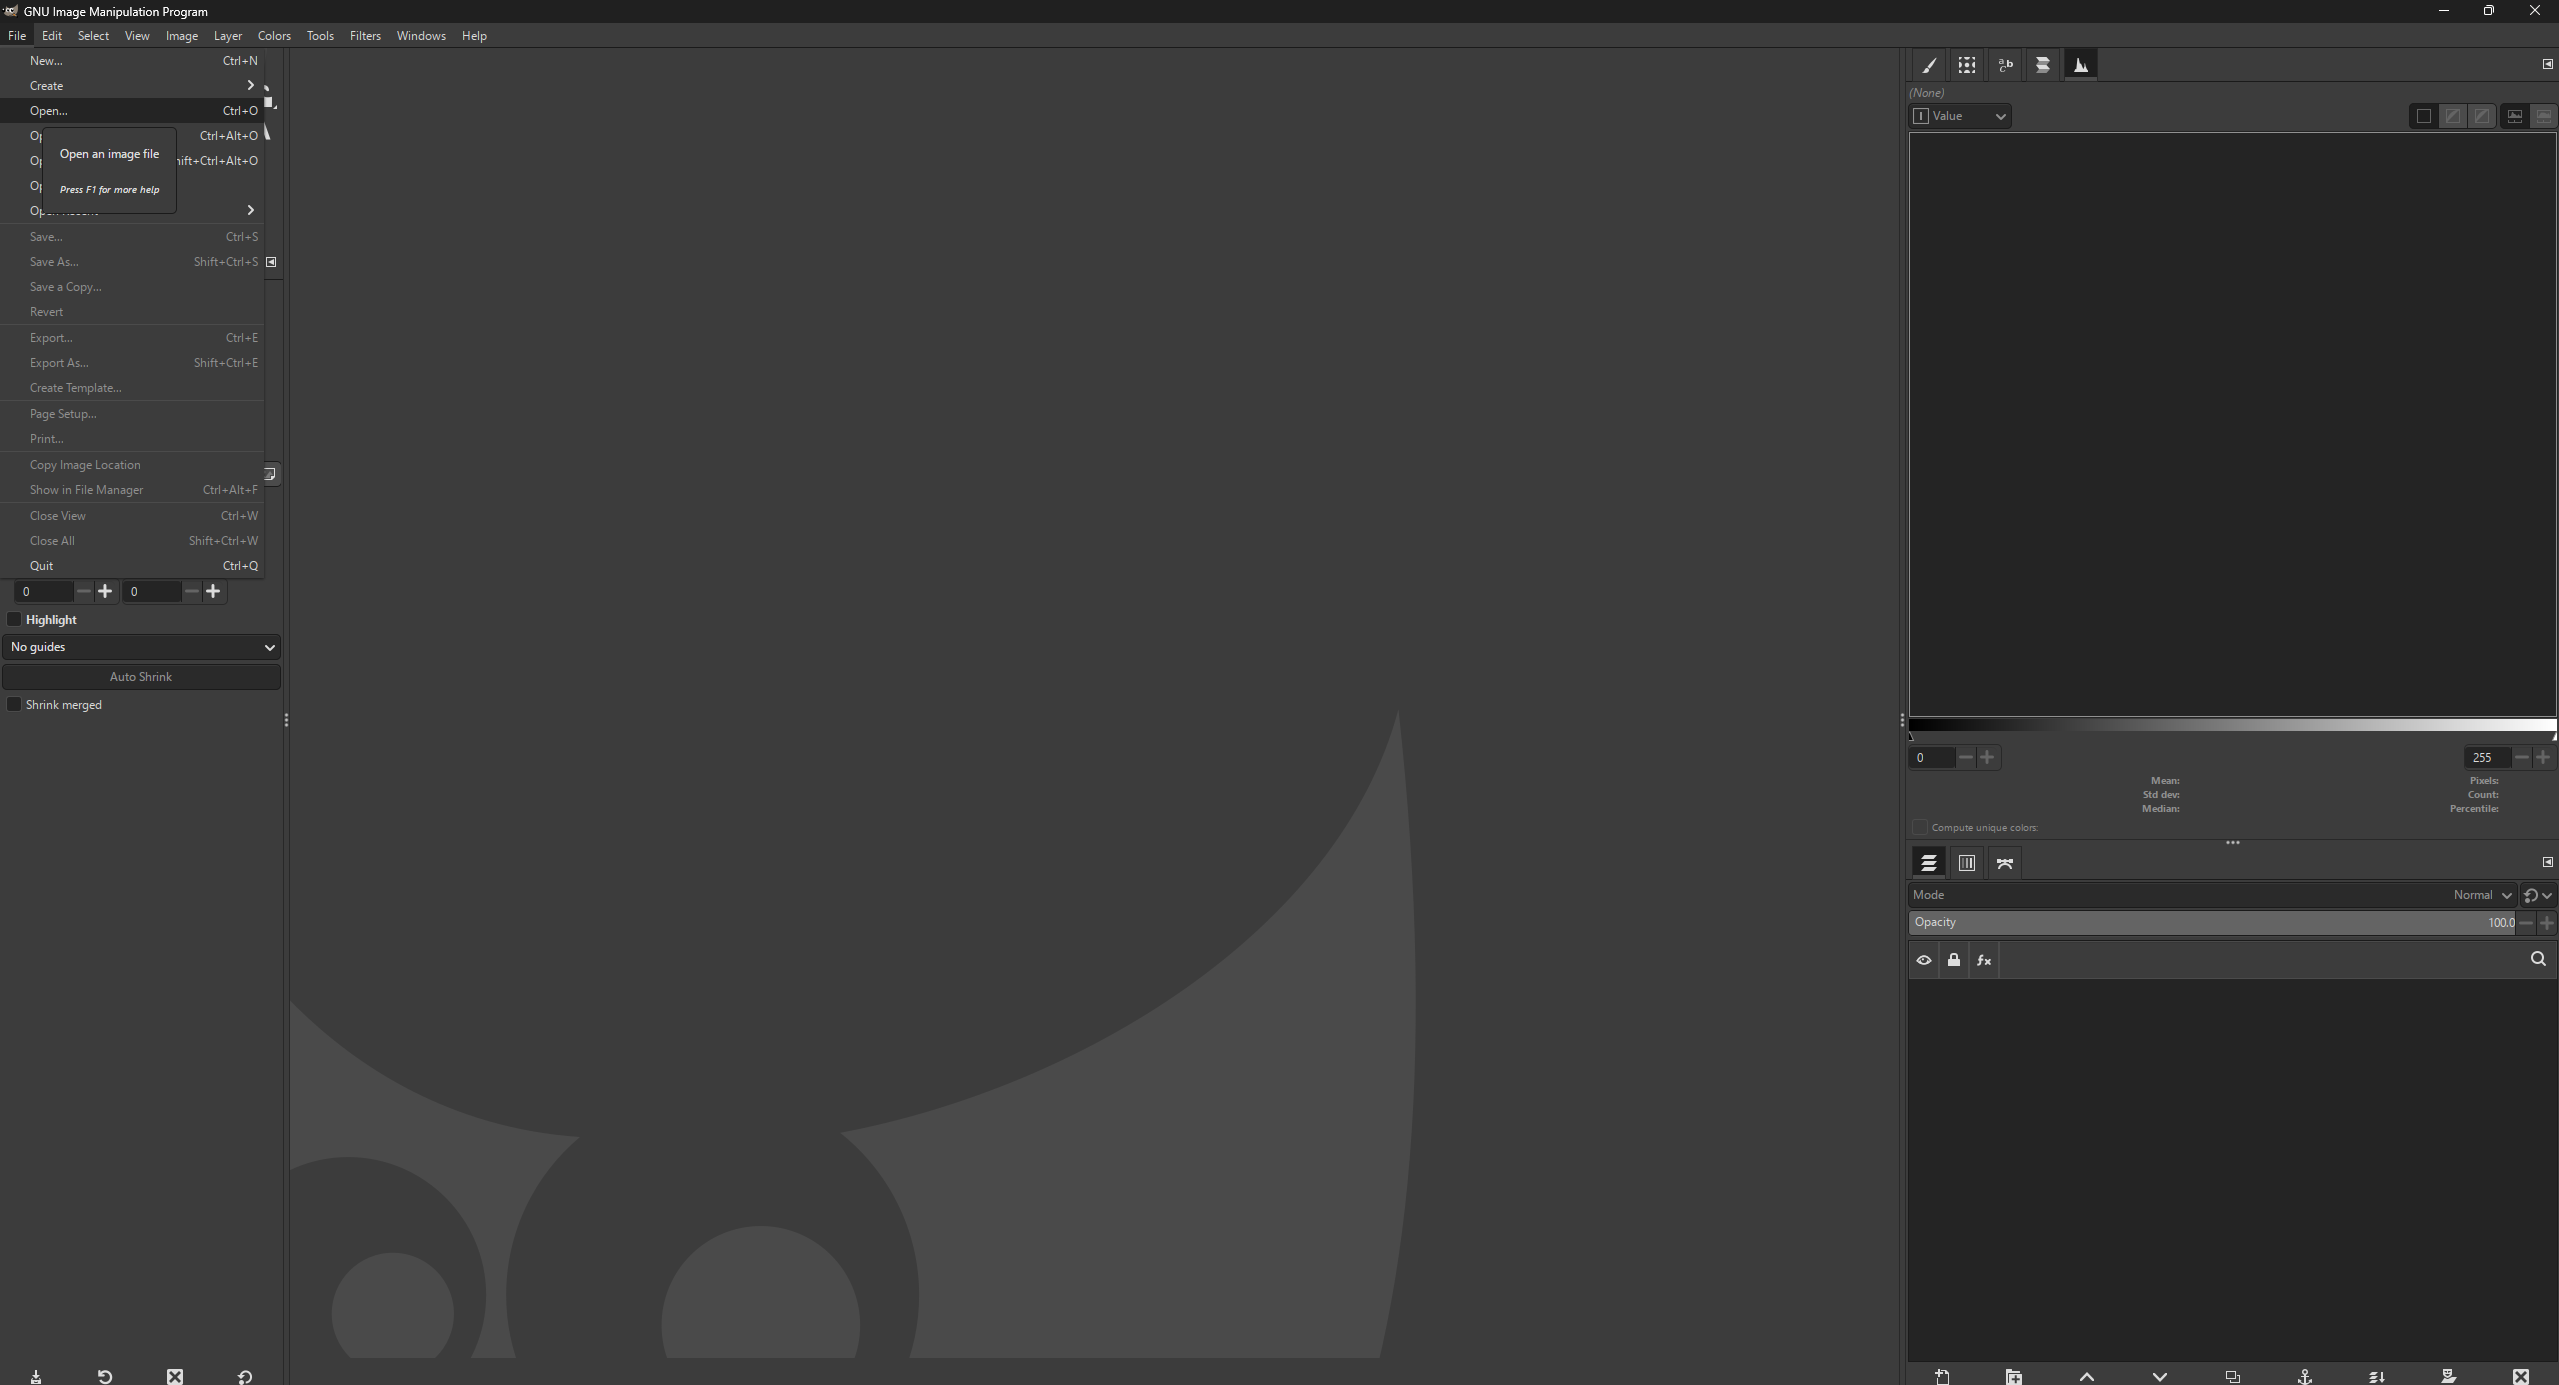
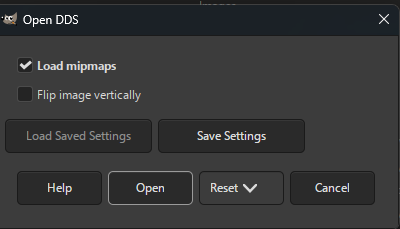
Click Open
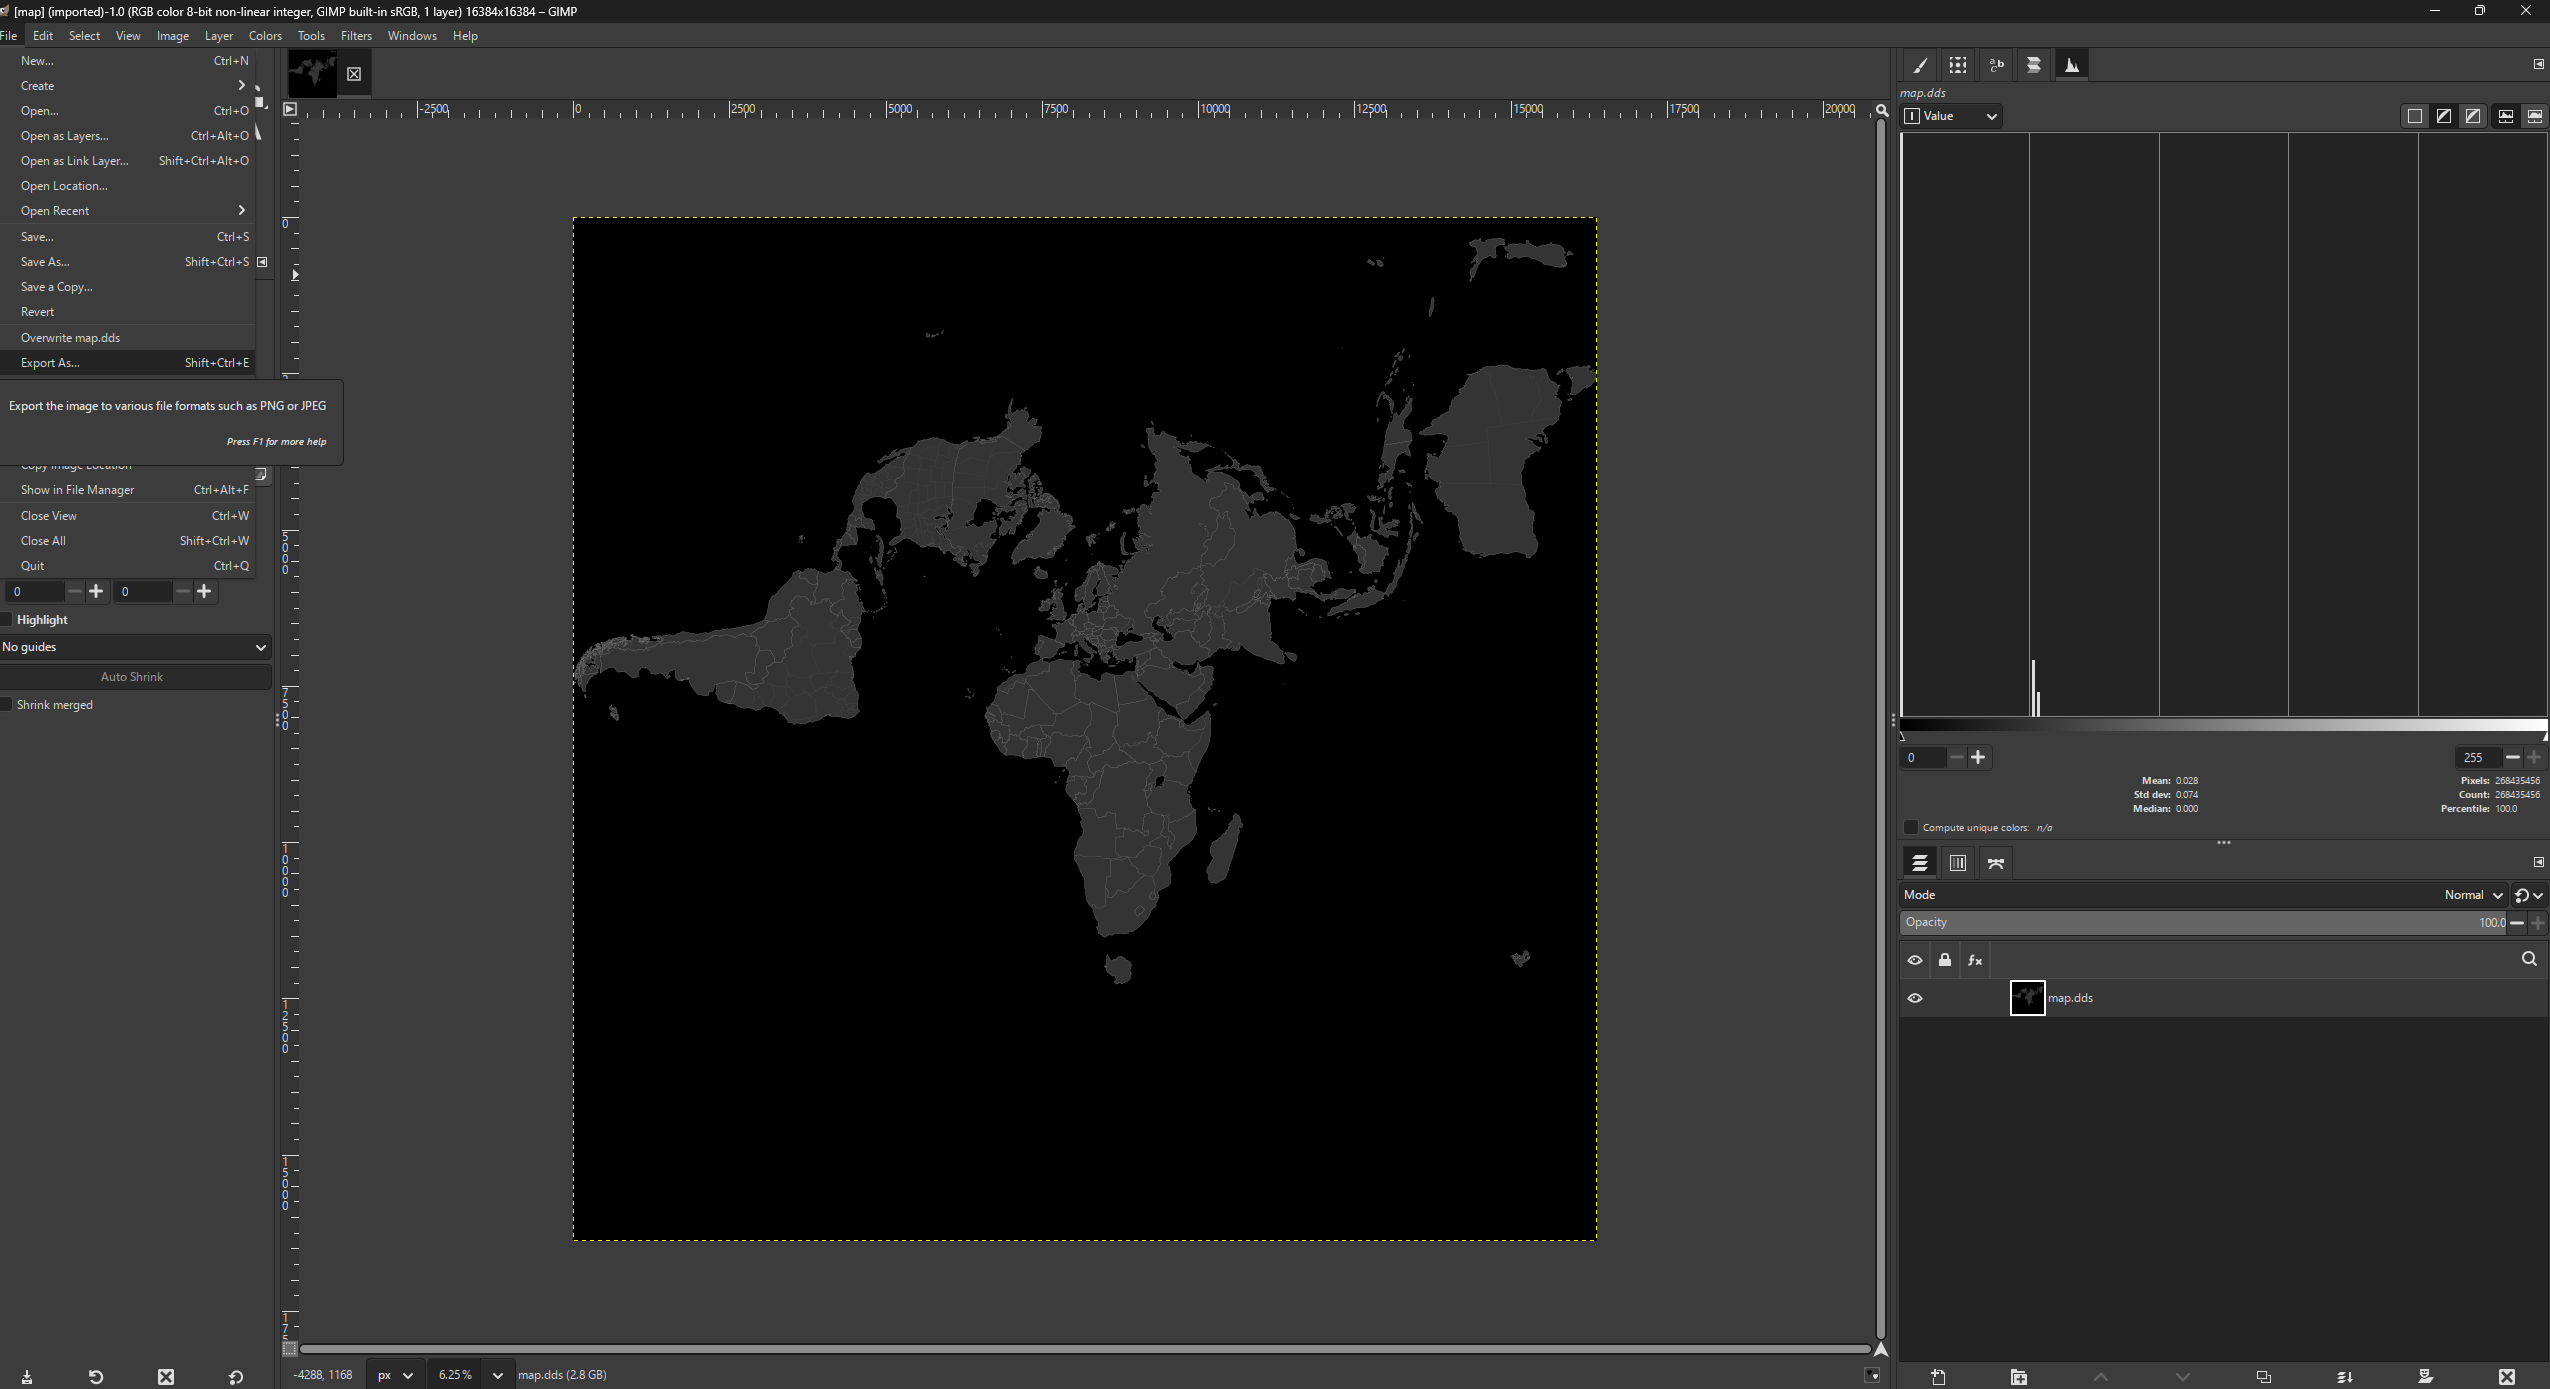
Then click File > Export As… or press Ctrl + Shift + E
Change dds to png and click export where you like that
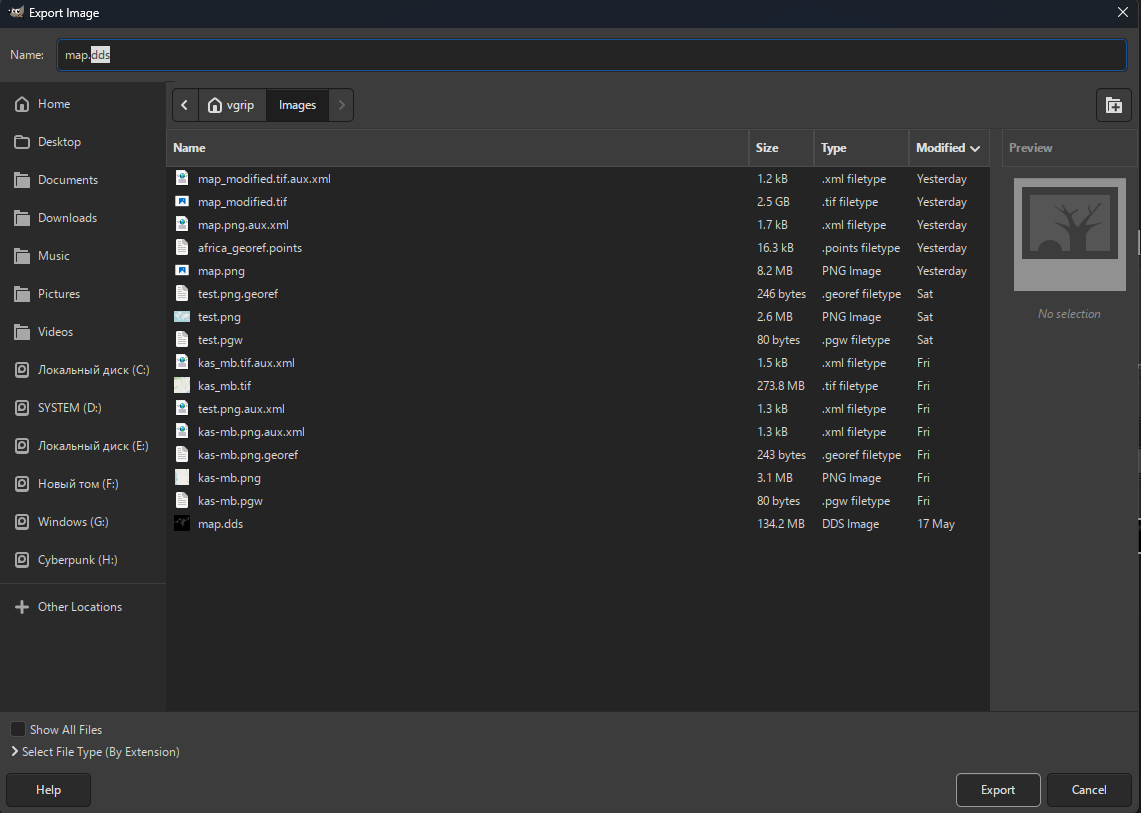
Just click Export
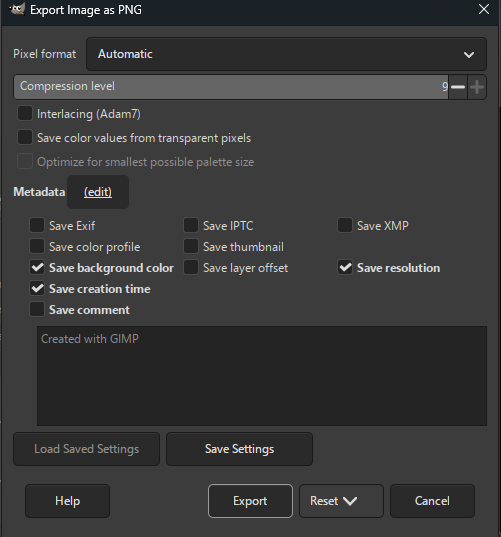
There you have your (yourname).png
QGIS setting up
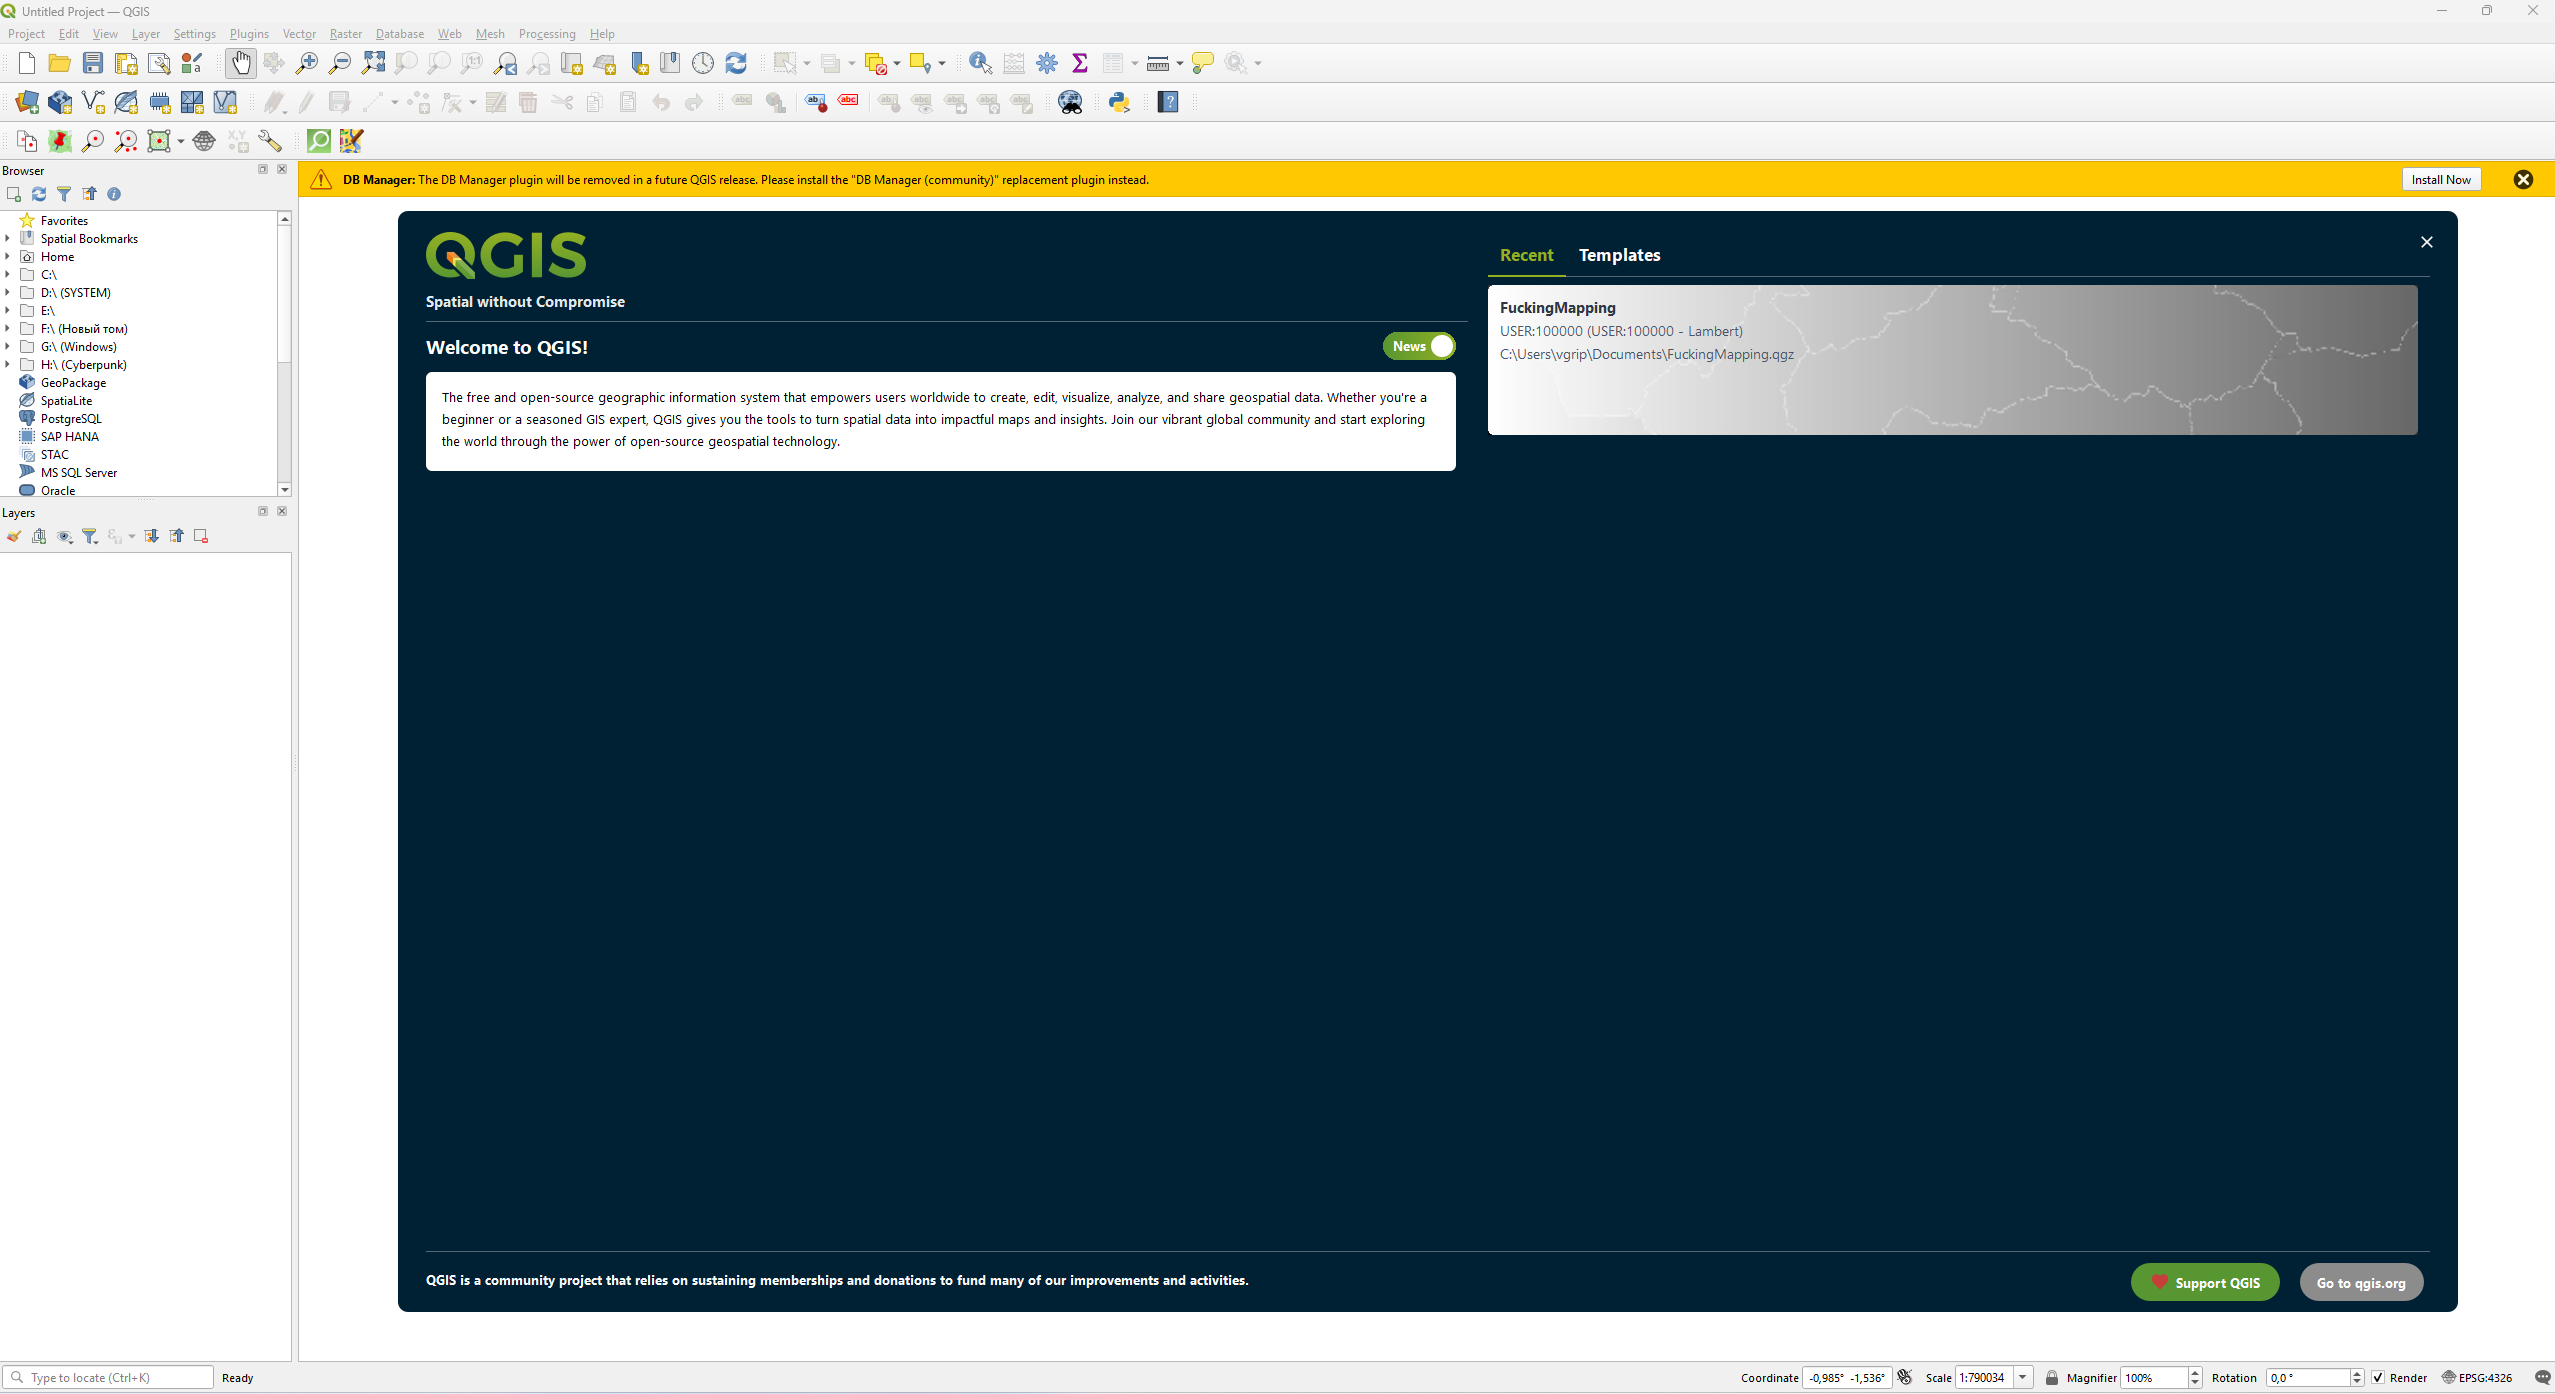
Open QGIS, you will see this:
Adding real maps
To add real maps(OpenStreetMap, Google Maps), do the following:
-
In the left sidebar, scroll the list untill you see XYZ Tiles
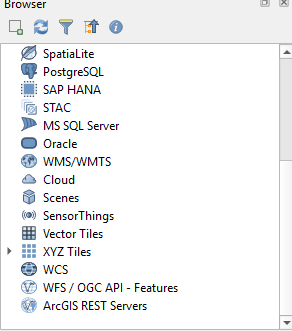
Note: XYZ Tiles WILL NOT have an arrow next to it.
-
Left-click on it and select New Connection…
-
This window will appear
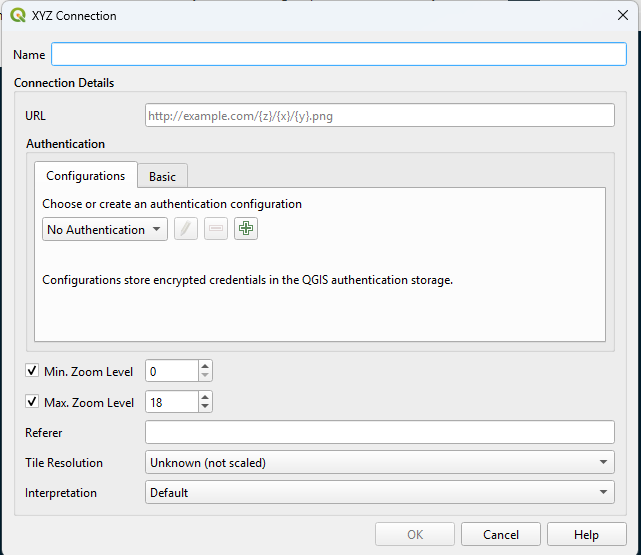
URL connection link can be found on google, but here are the main ones:
OpenStreetMap: https://tile.openstreetmap.org/{z}/{x}/{y}.png
Google Satellite: http://mt0.google.com/vt/lyrs=s&hl=en&x={x}&y={y}&z={z}
Google Satellite Hybrid(have labels): http://mt0.google.com/vt/lyrs=y&hl=en&x={x}&y={y}&z={z}
For Name enter whatever you like.
-
Then click OK and it will appear in the list inside XYZ Tiles. Double-click it to view it on the middle screen. It will also be added to the layers list on the left
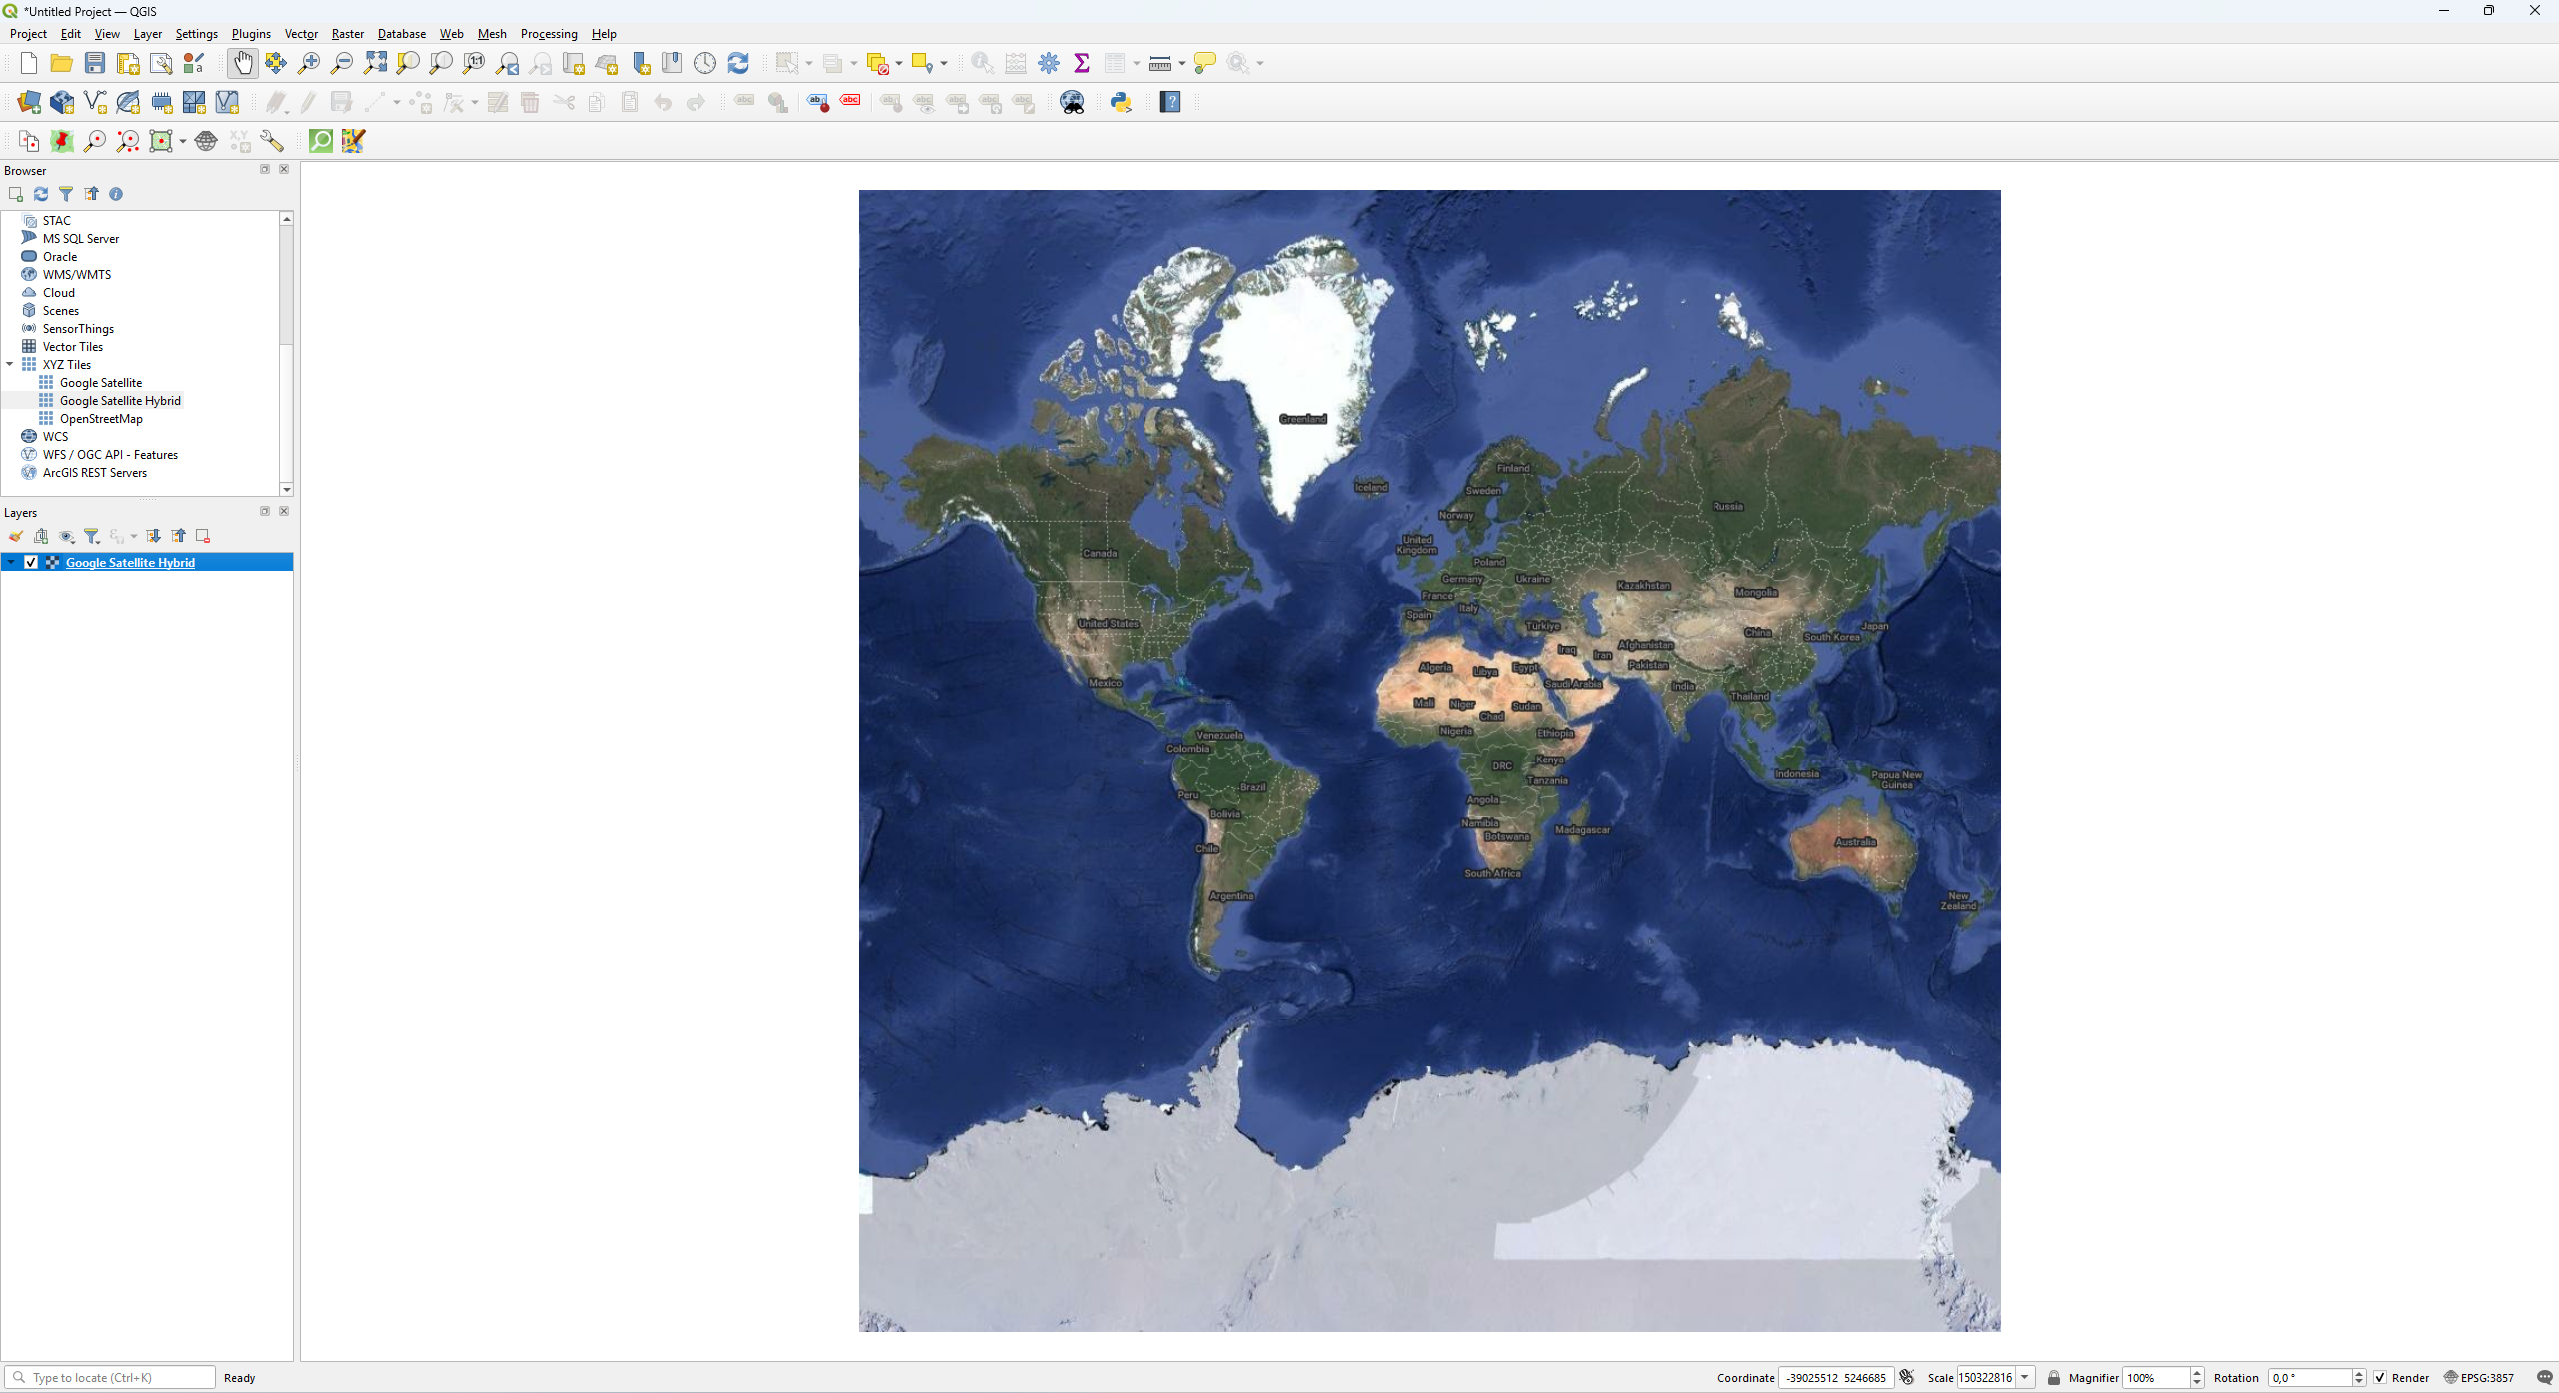

Concept
We will extract a portion of the map(preferrably a full country) and then map it to the in-game map you downloaded. Then the map will transform accordingly, and you will export it for use in-game.
Exporting real map
Navigate the map to find the area you want to export, like you would in any other map I will export Tanzania for example:
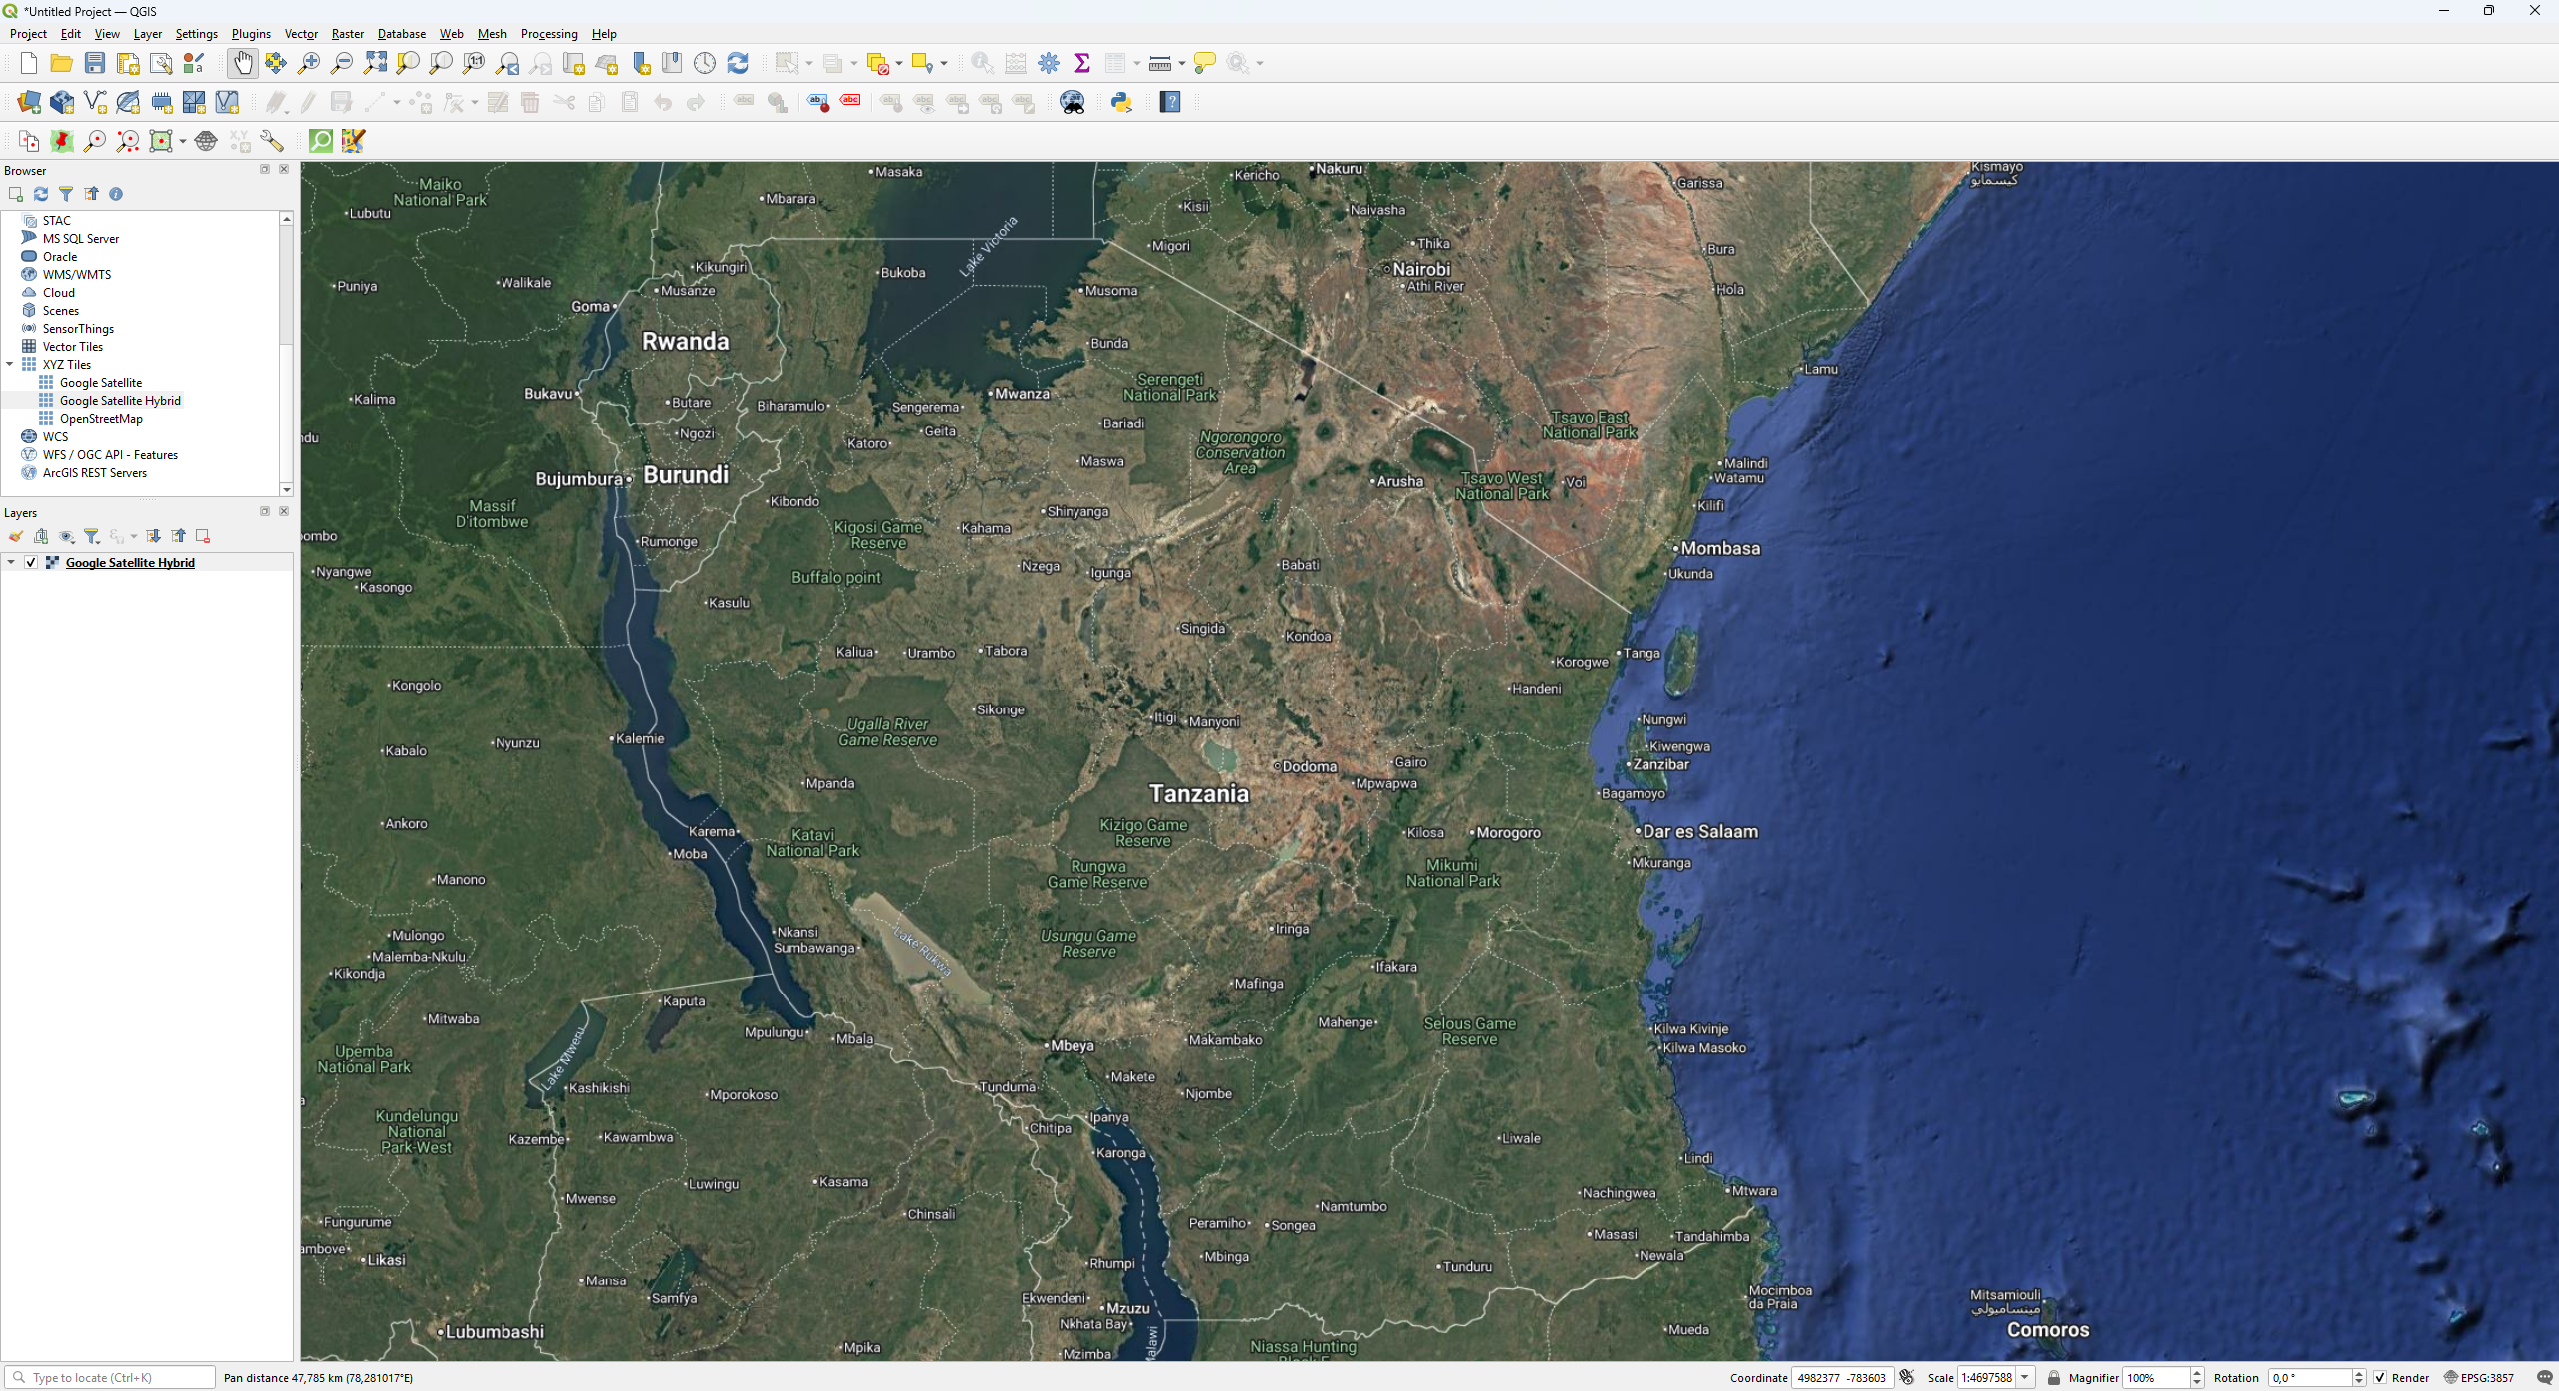
Once you have the desired area in the viewport, right-click on the map layer in the left panel, then select Export > Save As…:
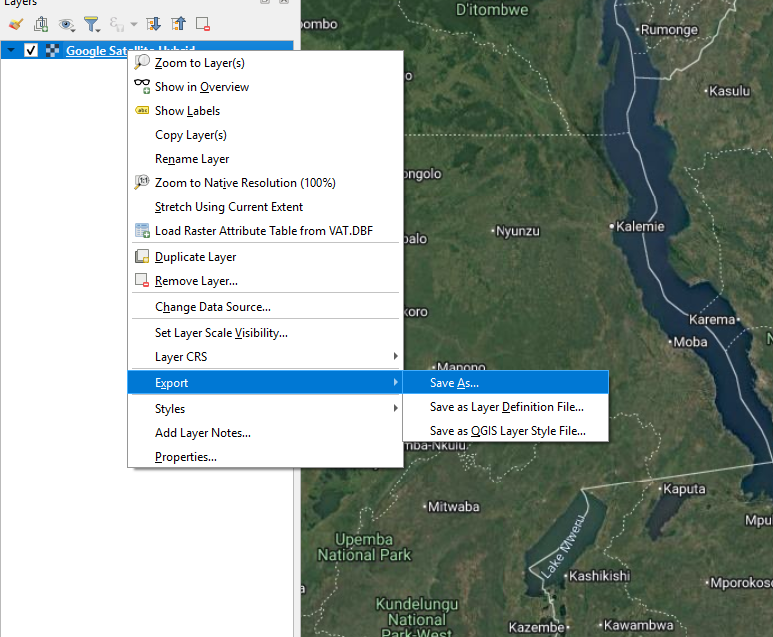
You will see this window:
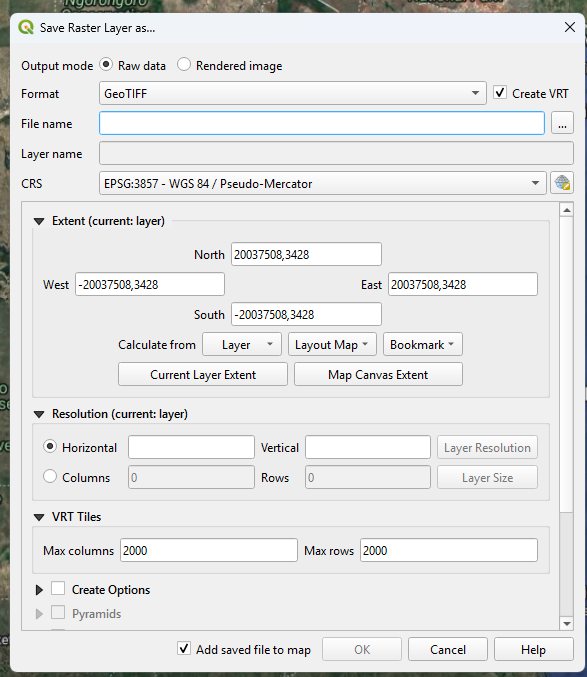
Disable Create VRT. In filename press on “…” button and choose a name and a location for the resulting image.
Click on Map Canvas Extent - this will capture what you are seeing on the screen. You can also click on Current Layer Extent if you have any other layers, but make sure to select the appropriate one.
In Resolution you are entering numbers representing scale: the larger the number the lower the resulting map resolution.
Do not use columns and rows, maps will be distorted.
Coumns and rows determine your resulting image size, so choose carefully. Otherwise, you could end up with a 20gb image.
After that, click OK and the map will begin saving. Watch the progress bar at the bottom of the screen.
You will get (yourname).tif file.
Importing ETS2 Background
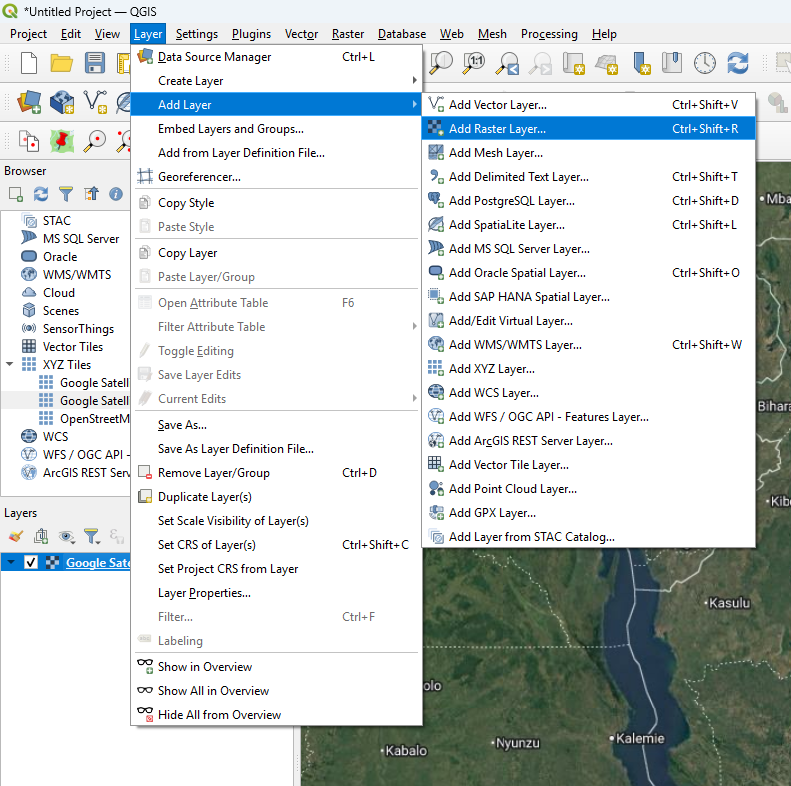
At the top of the screen, click on Layer and select Add Layer > Add Raster Layer.
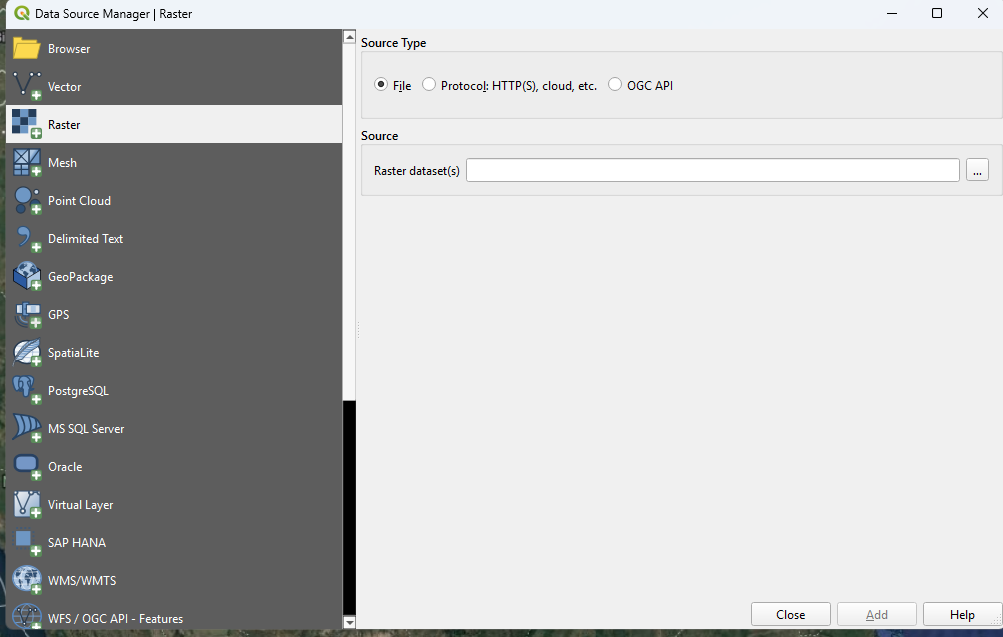
In this window press on … and select your exported map from the mod, then click Add
The image will appear in the Layers list:
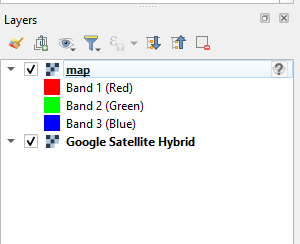
The “map” will be very small, don’t worry’ if it’s not visible.
Next, click on the checkmark next to your real map to hide it, then select “map” layer.
On the toolbar, click on the magnifying glass with 1:1 to zoom into the “map” layer.

You should now see your map!
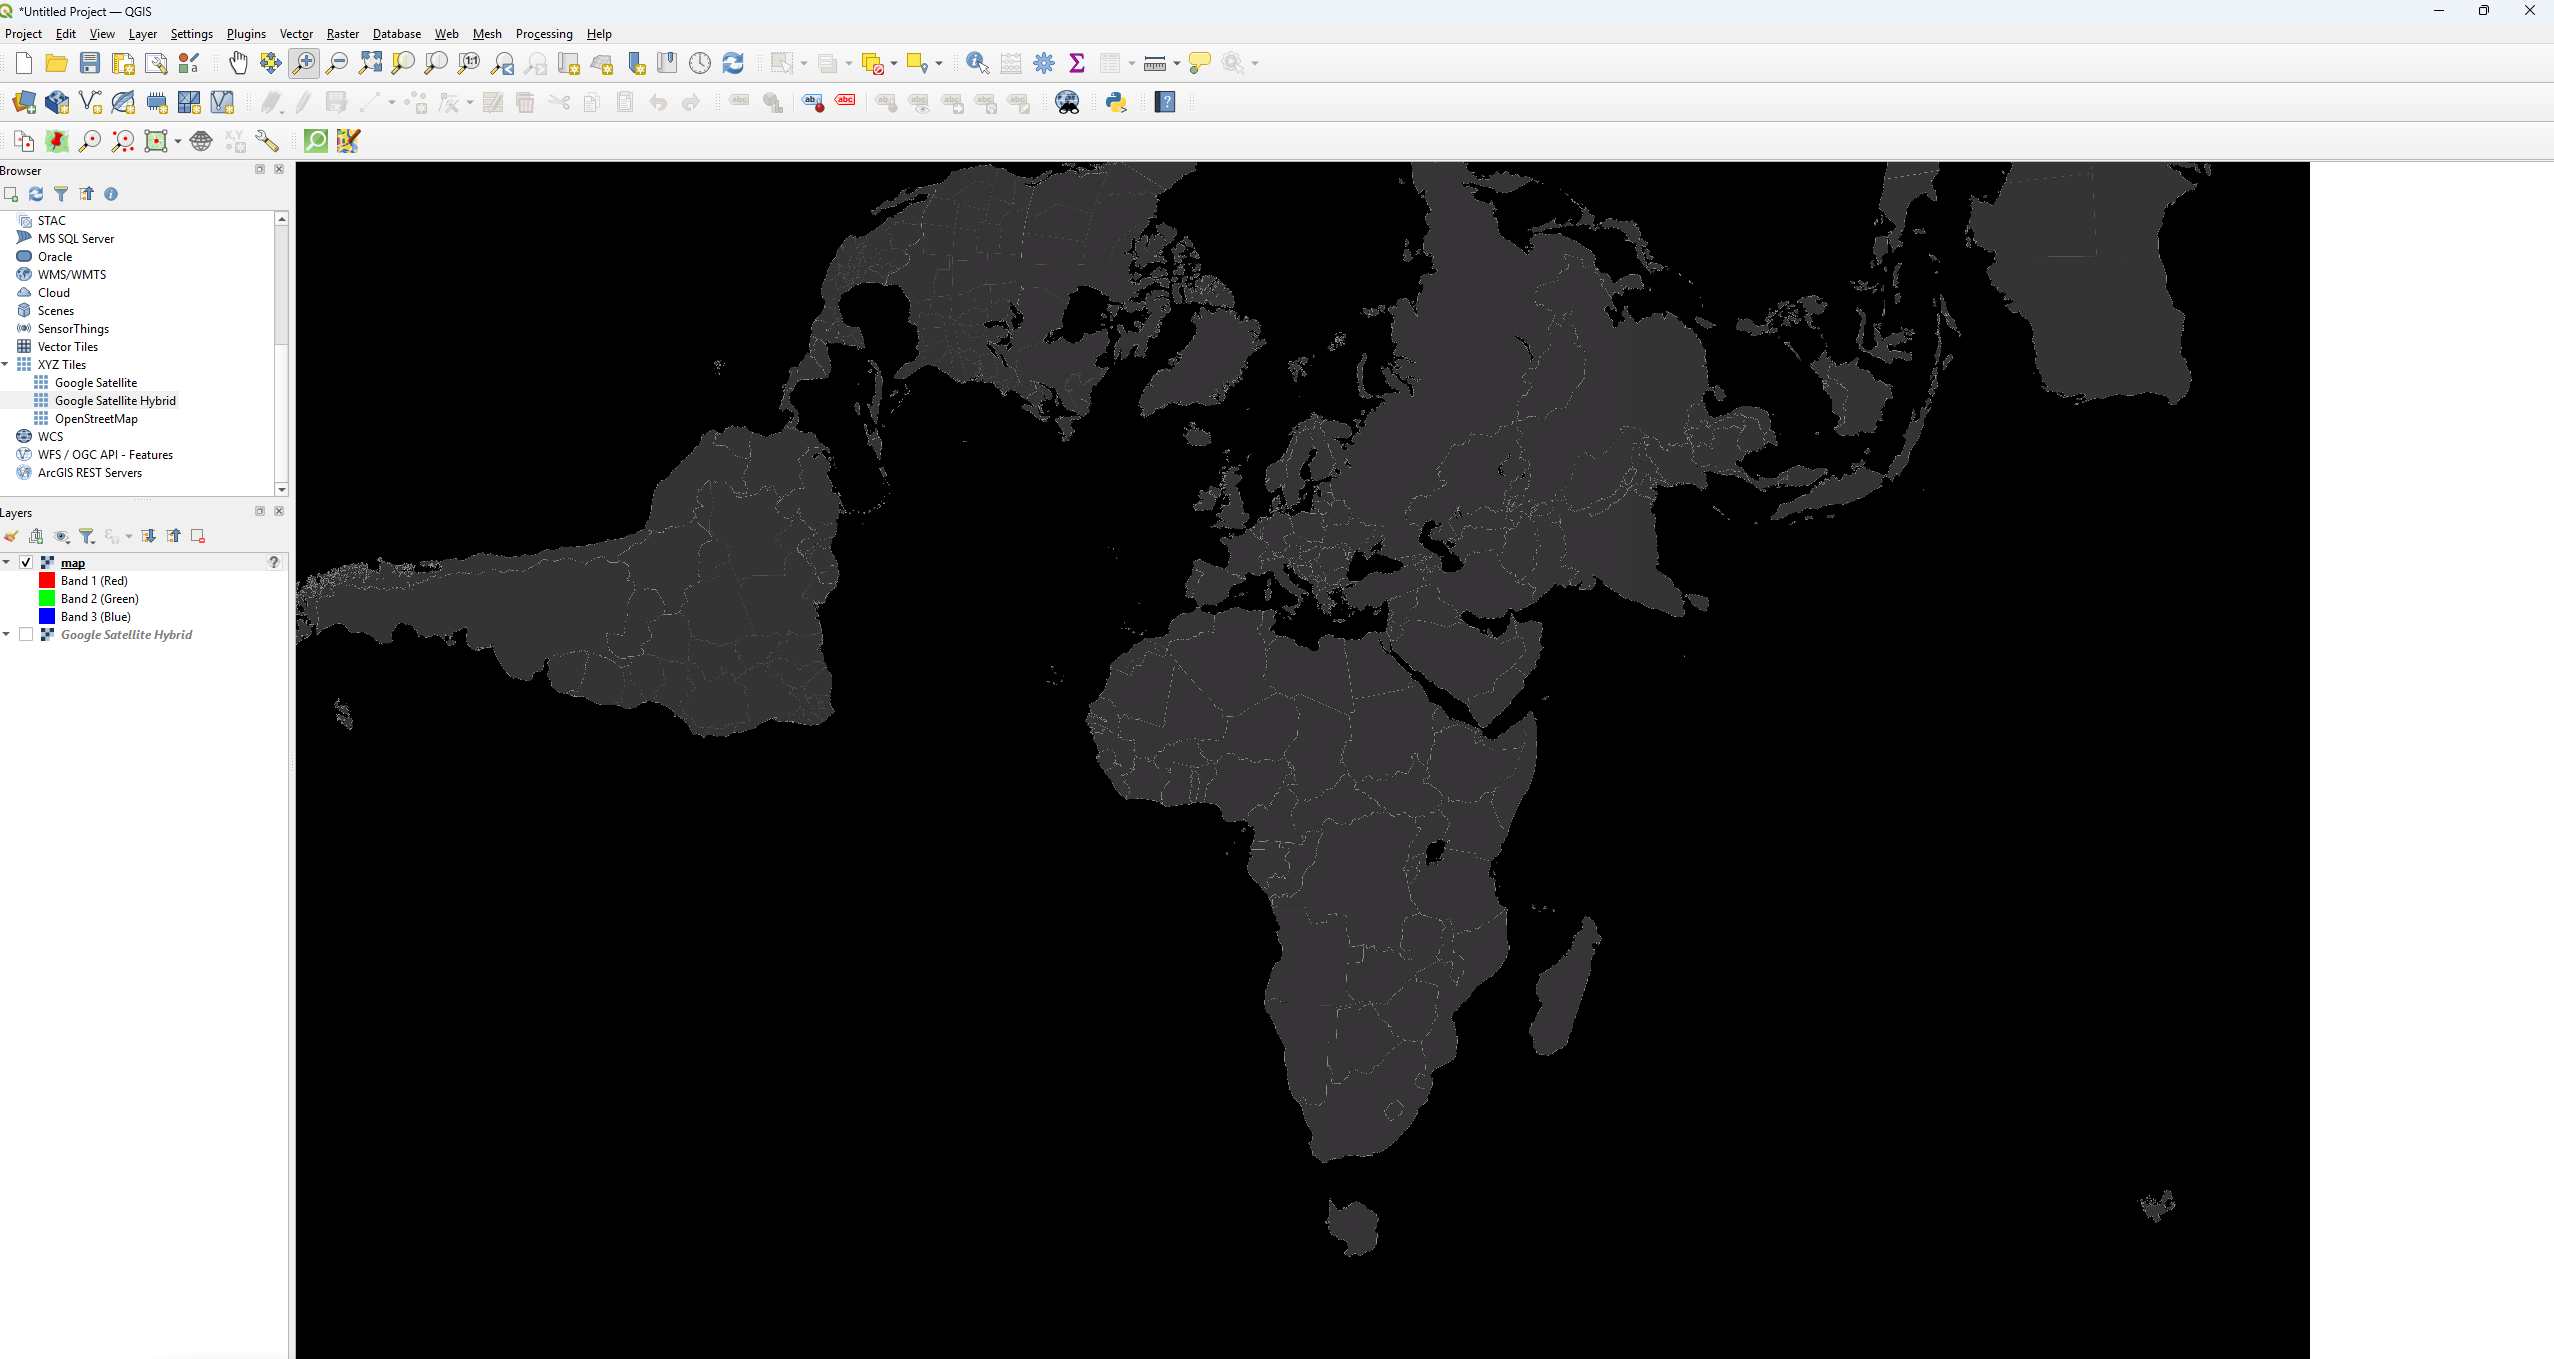
Georeferencing real map to the ETS2
(Ignore USER:10000 - Lambert in my windows)
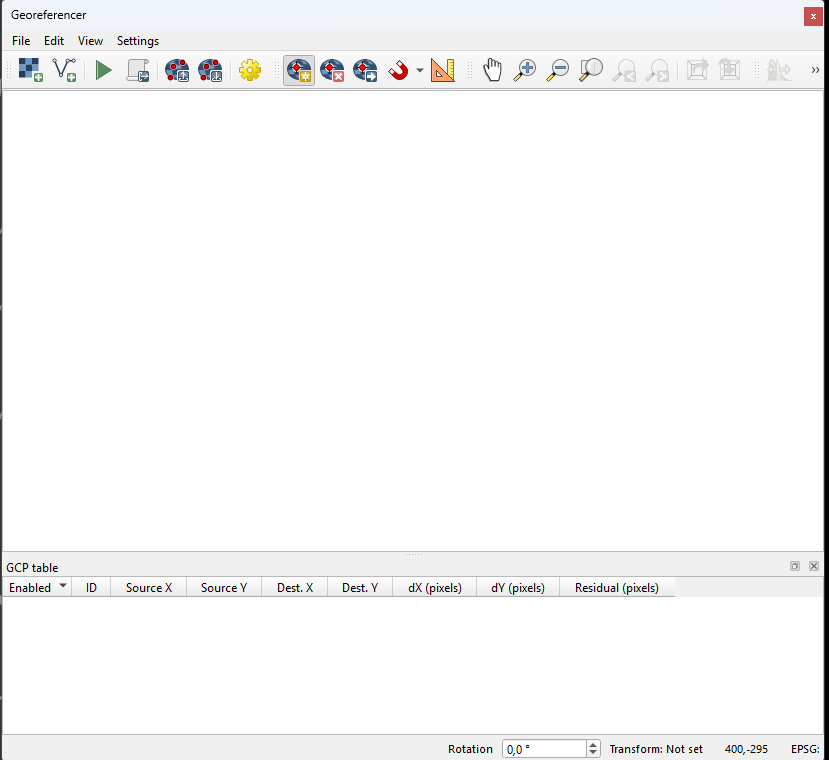
At the top, click Layers > Georeference…

A new window will appear:
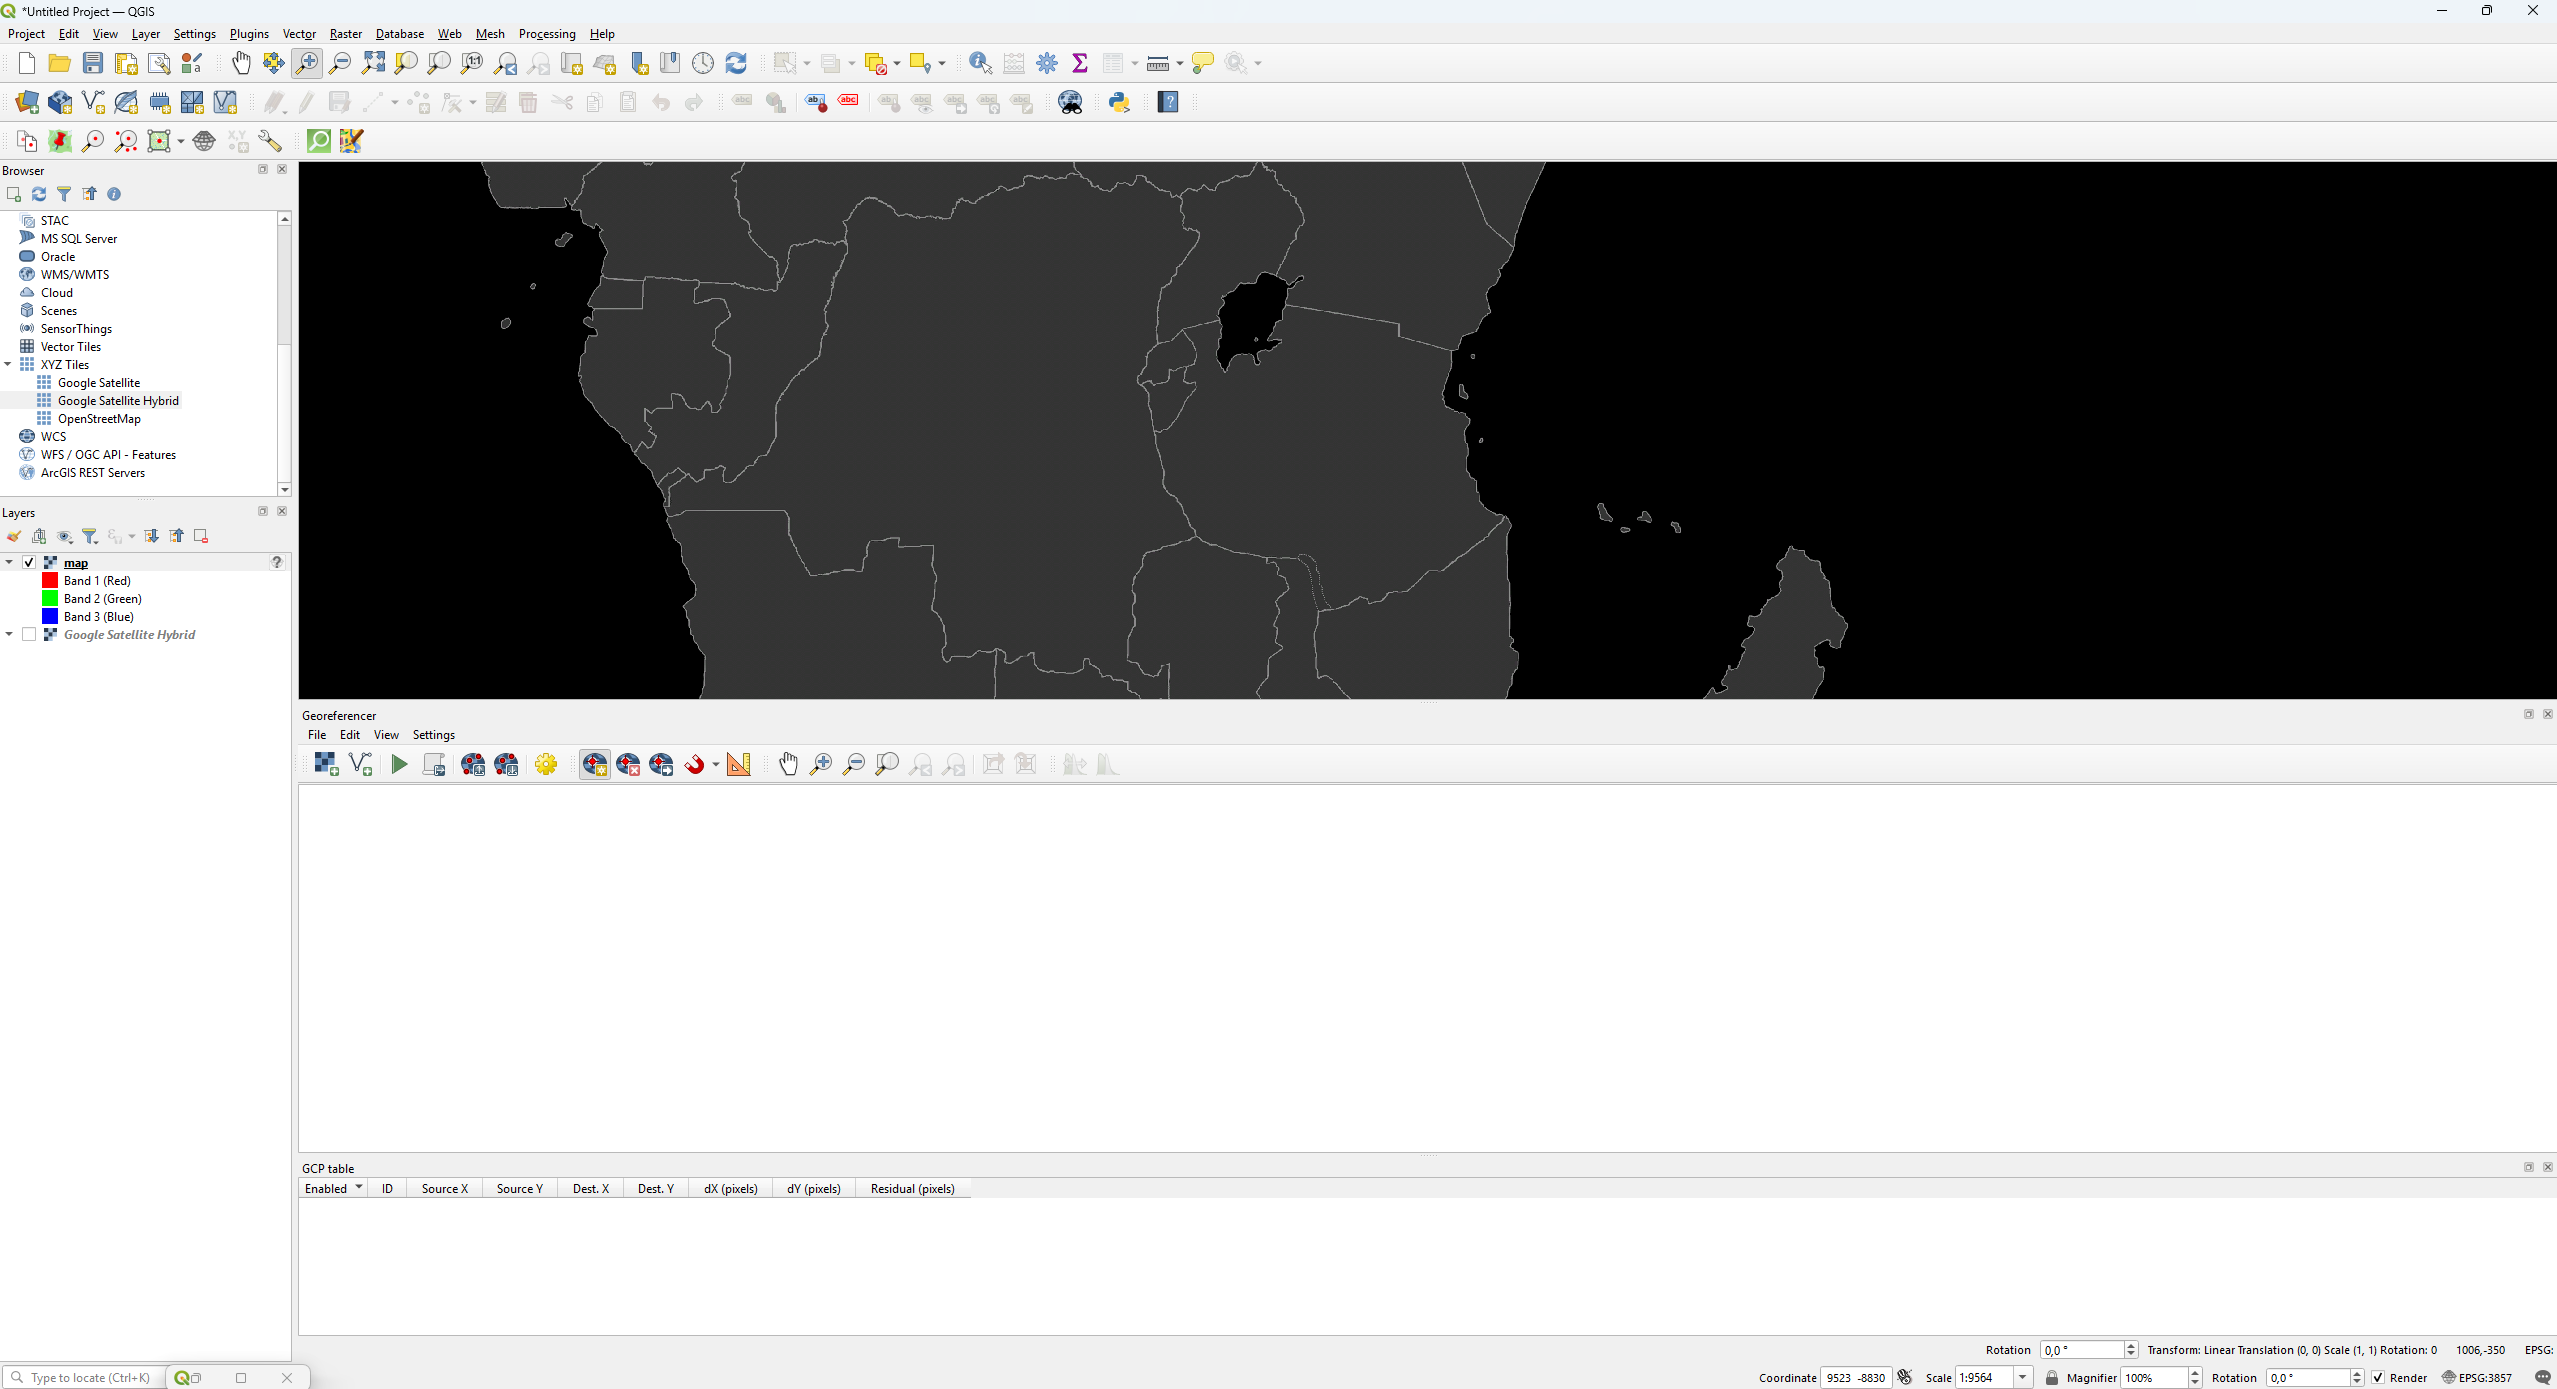
Go to Settings > Configure Georeference.. and tick the box for Show Georeferencer window docked, then click Ok.
The window will now be docked to the bottom. You can resize it by dragging its borders to your preferred size.
Now, in the Georeferencer window, click on this icon  And import you real map (yourname).tif image that we exported earlier.
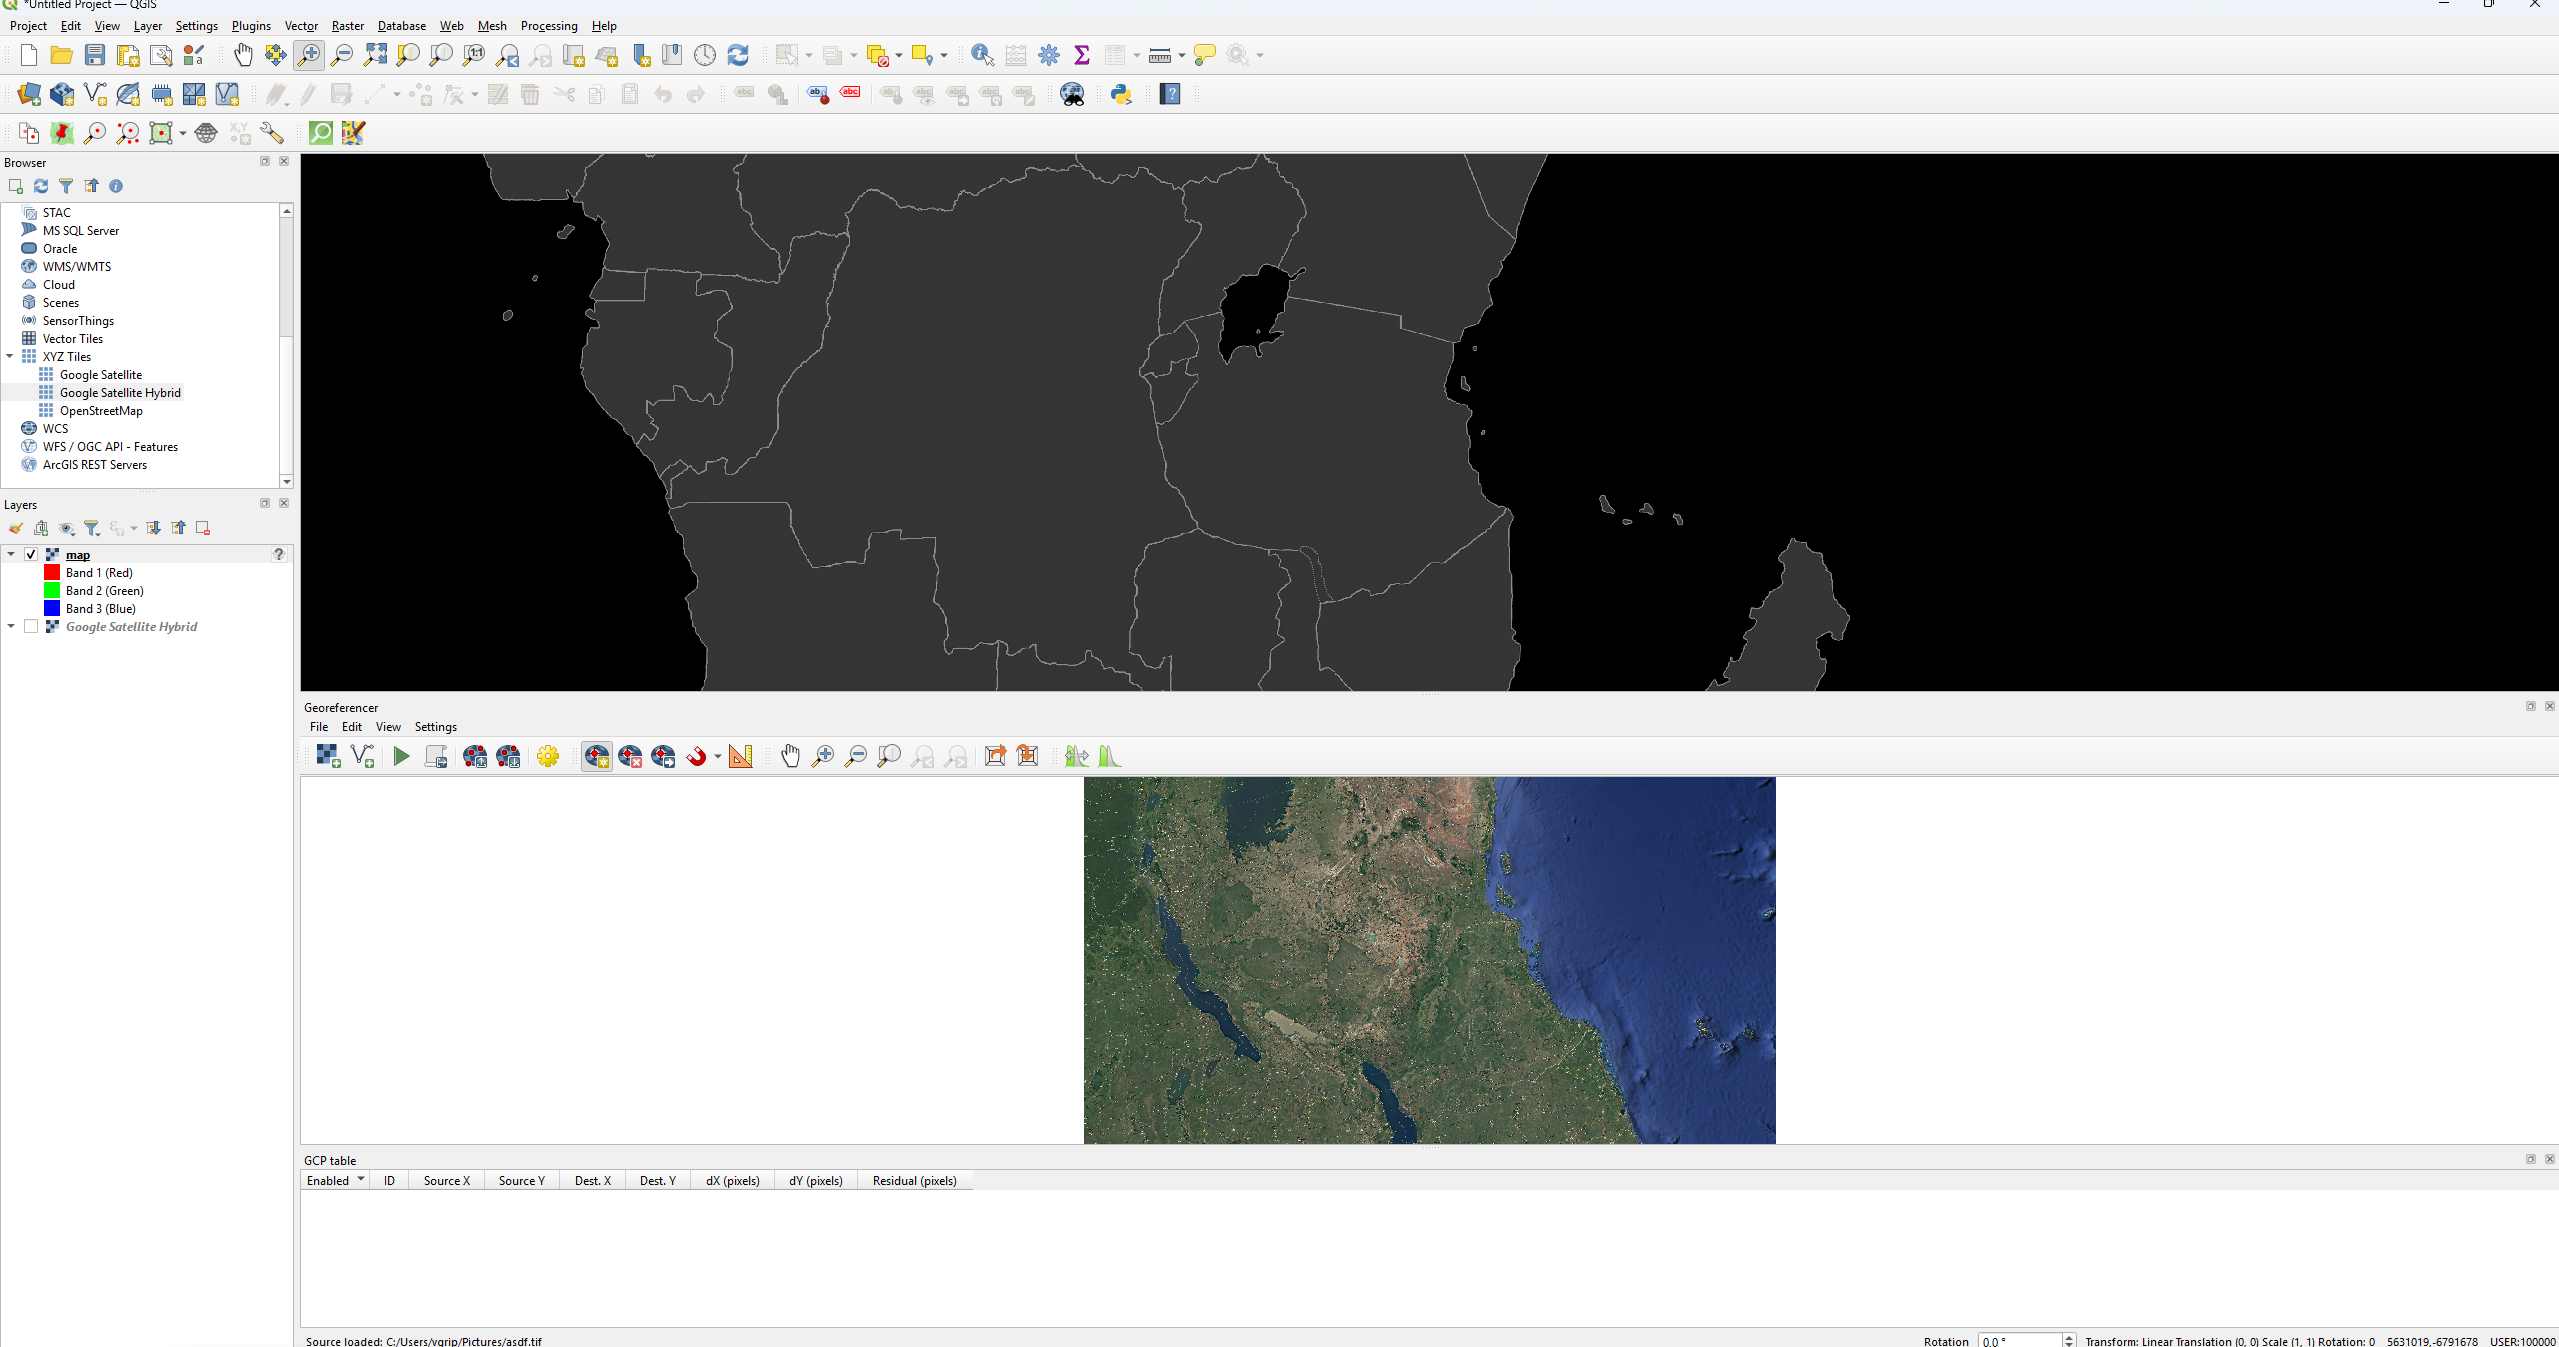
Now we need to change the transformation settings. Click on the gold cog in the toolbar and set Transformation type to Thin Plate Spline
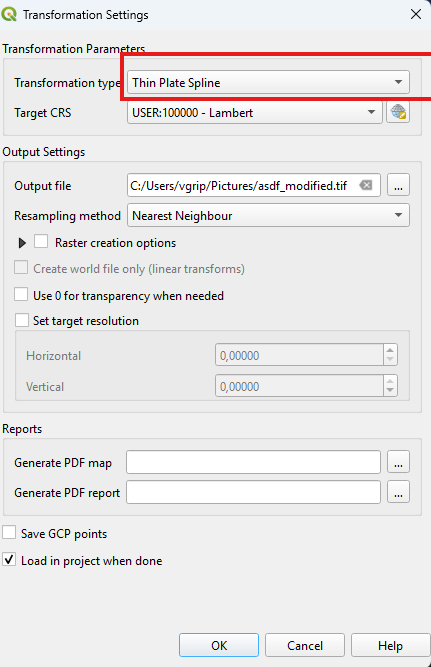 Below that, in the Output file, you can set the name and location to save it
Now the boring part, in the georeferencer toolbar, you will see these 3 buttons

The first button is for placing geopoint. The second button is for removing it. The third button is for moving it.
**Important: ** do not use the third one if you accidentally place a point in the wrong point on the real map and save it, just delete and start over.
Now, select the placement tool. You will see a crosshair inside the georeferencer window. Click on some point(preferably country borders, easier to match with ets2 border).
A green dot will appear where you clicked, and this window will pop up. If you placed it in the wrong spot, simply click again in the georeferencer canvas to reposition it.
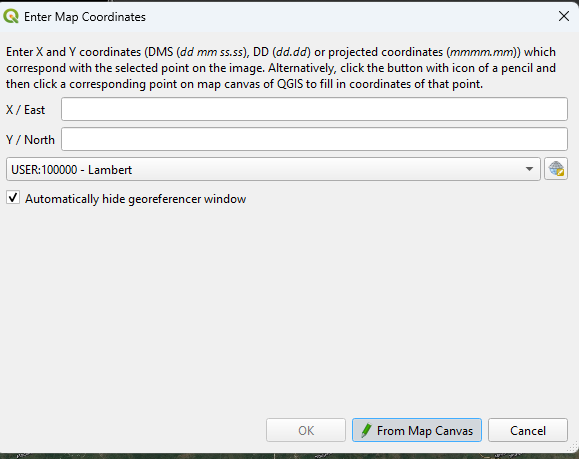
Press the From Map Canvas, then click on the exactly same point on the ets2 map. Again, a green dot will appear. Press OK if your are satisfied with its location.
Both points will turn red, and a new entry will appear in the GCP table:
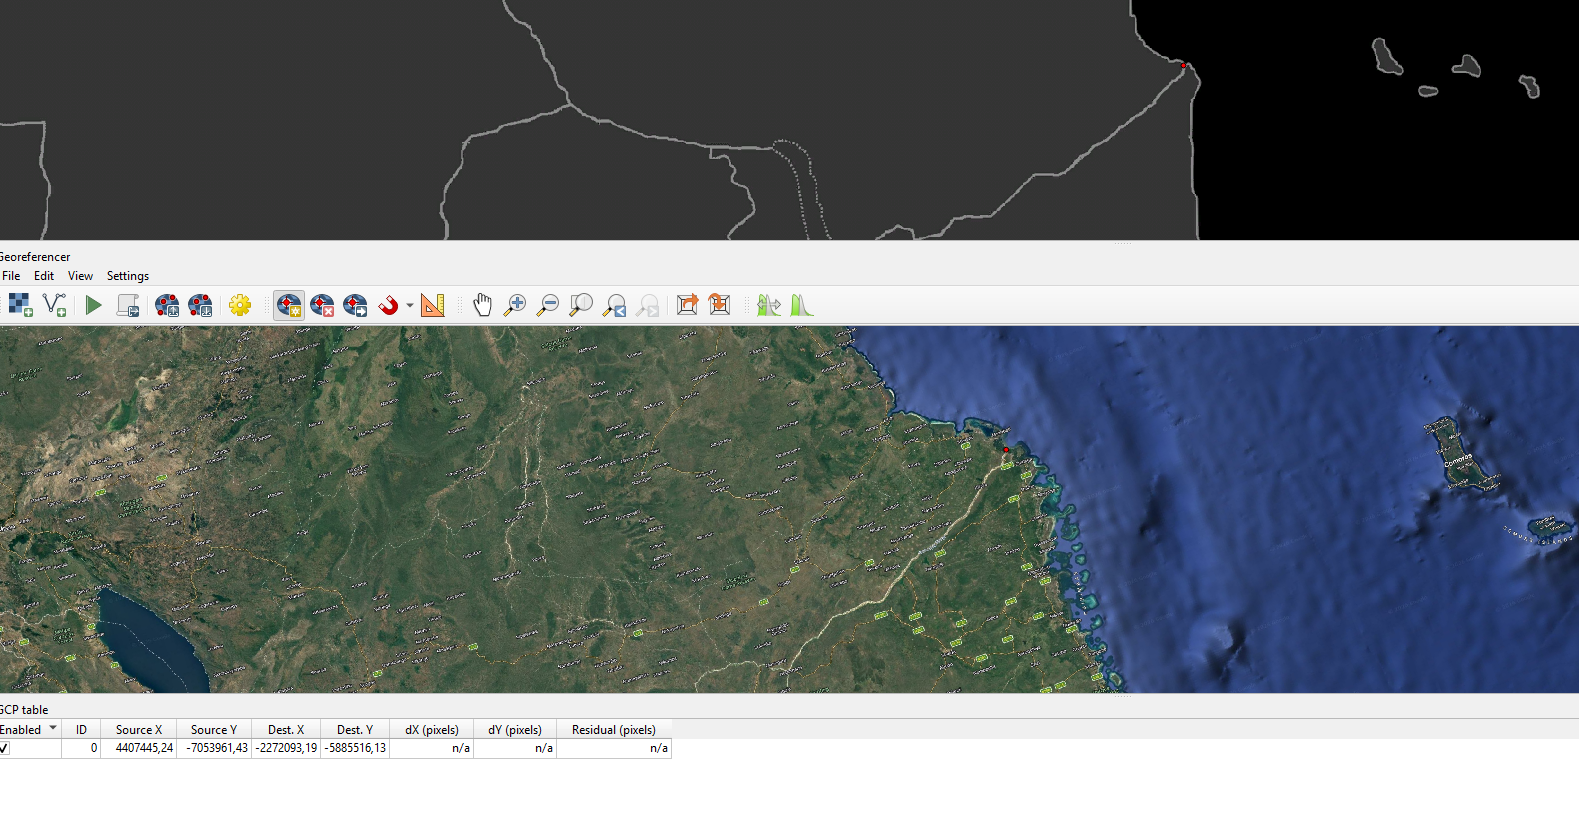
Repeat this procces all around the border and “circle” the entiry country for a correct transformation.
Lifehack: Press Space to pan the map around while using any tool. Select hand on the georeferencer toolbar, since space only works when the dock’s map is in focus.’
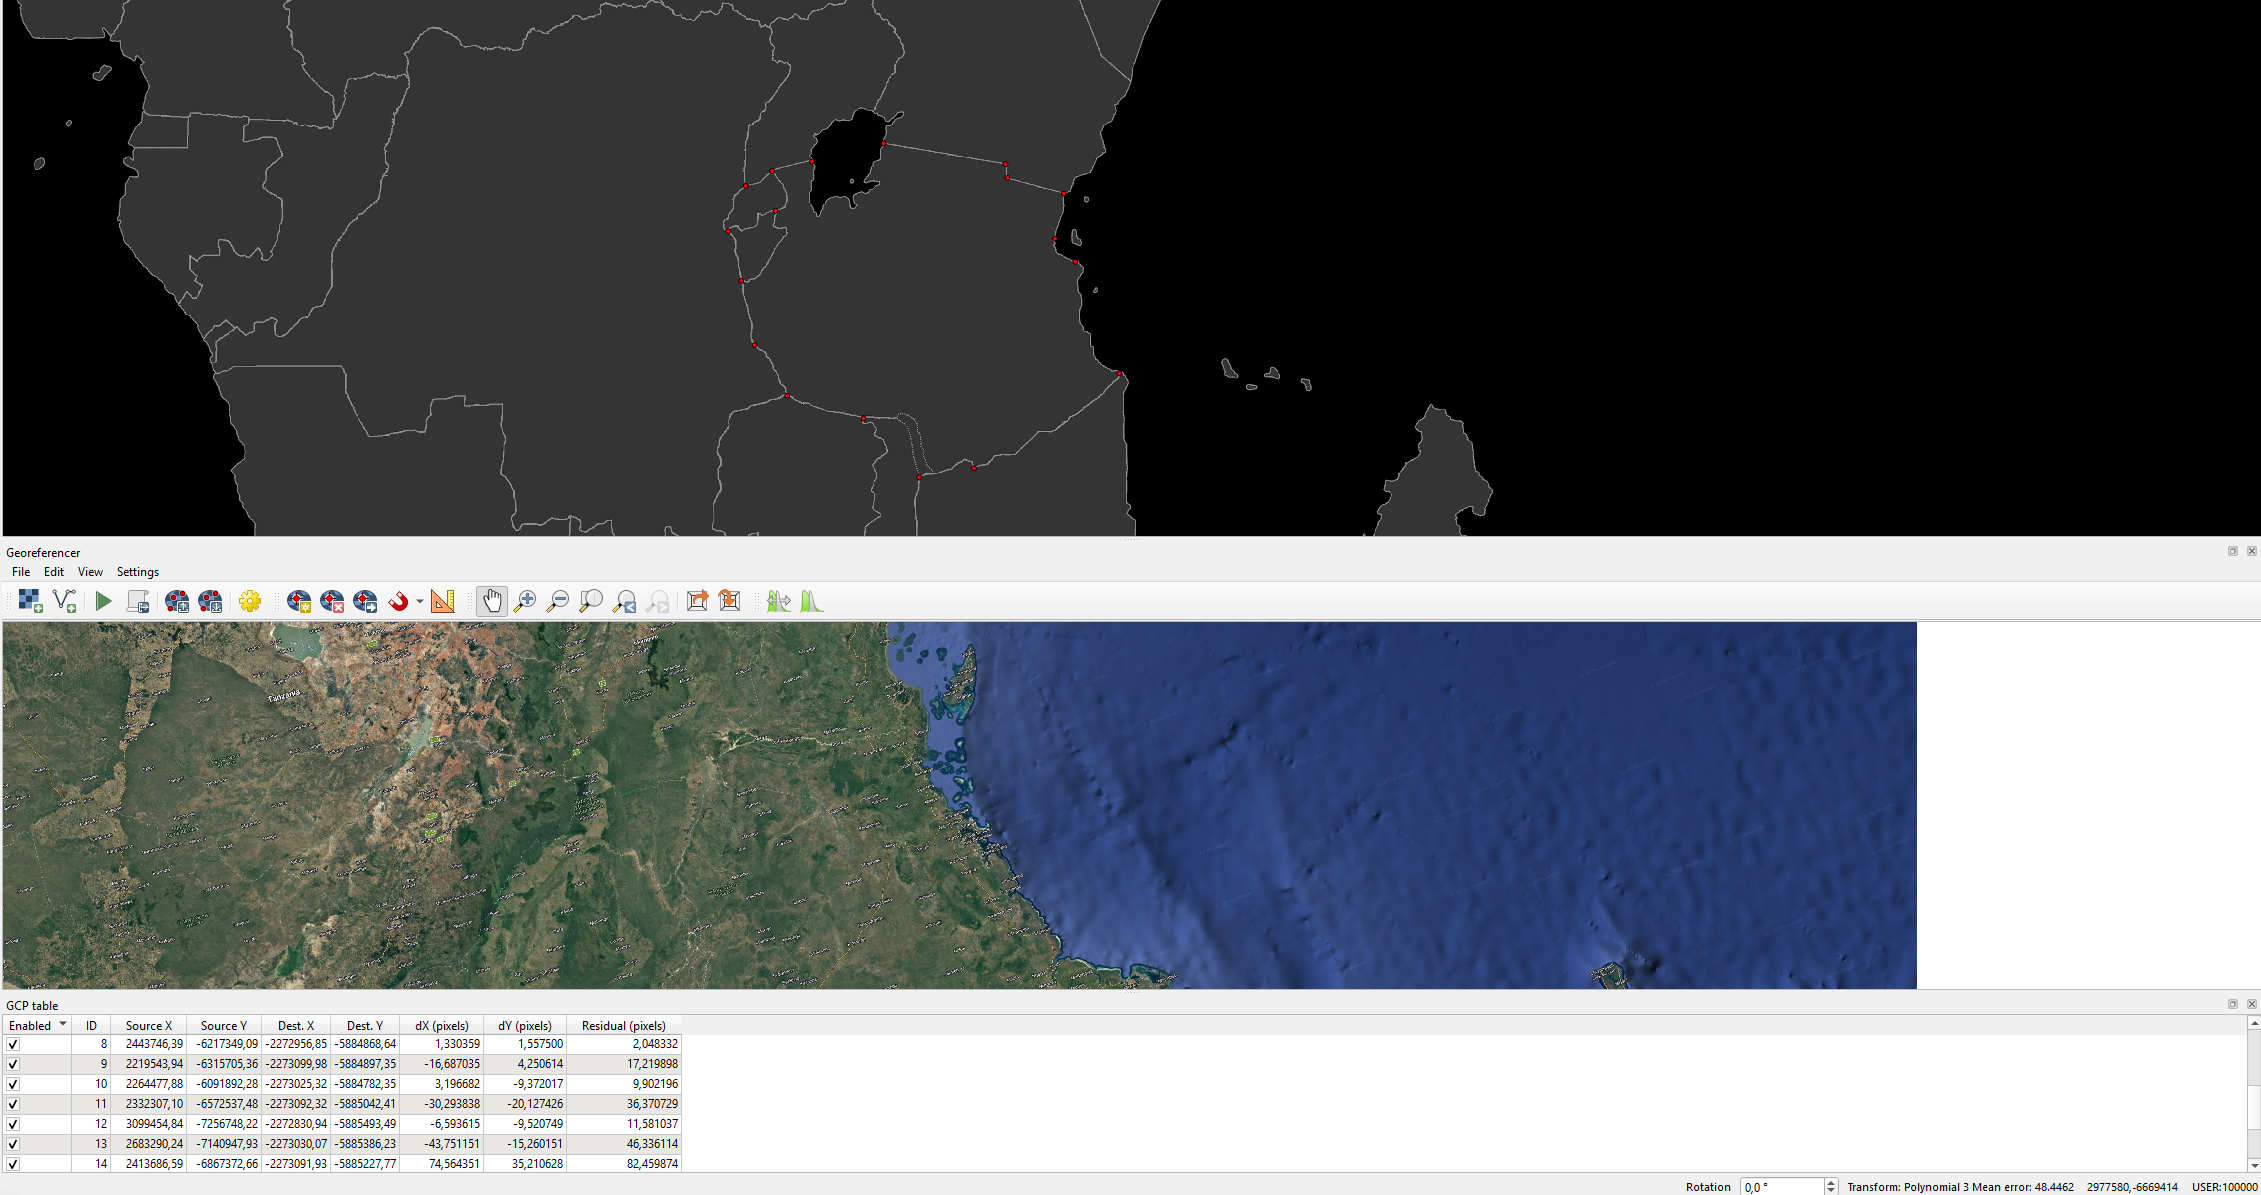 Now, in the georeferencer window, clock the green arrow to start the georeferencing process and wait untill it completes.
The real map will appear as a layer and on the ets2 map
Now, in the georeferencer window, clock the green arrow to start the georeferencing process and wait untill it completes.
The real map will appear as a layer and on the ets2 map
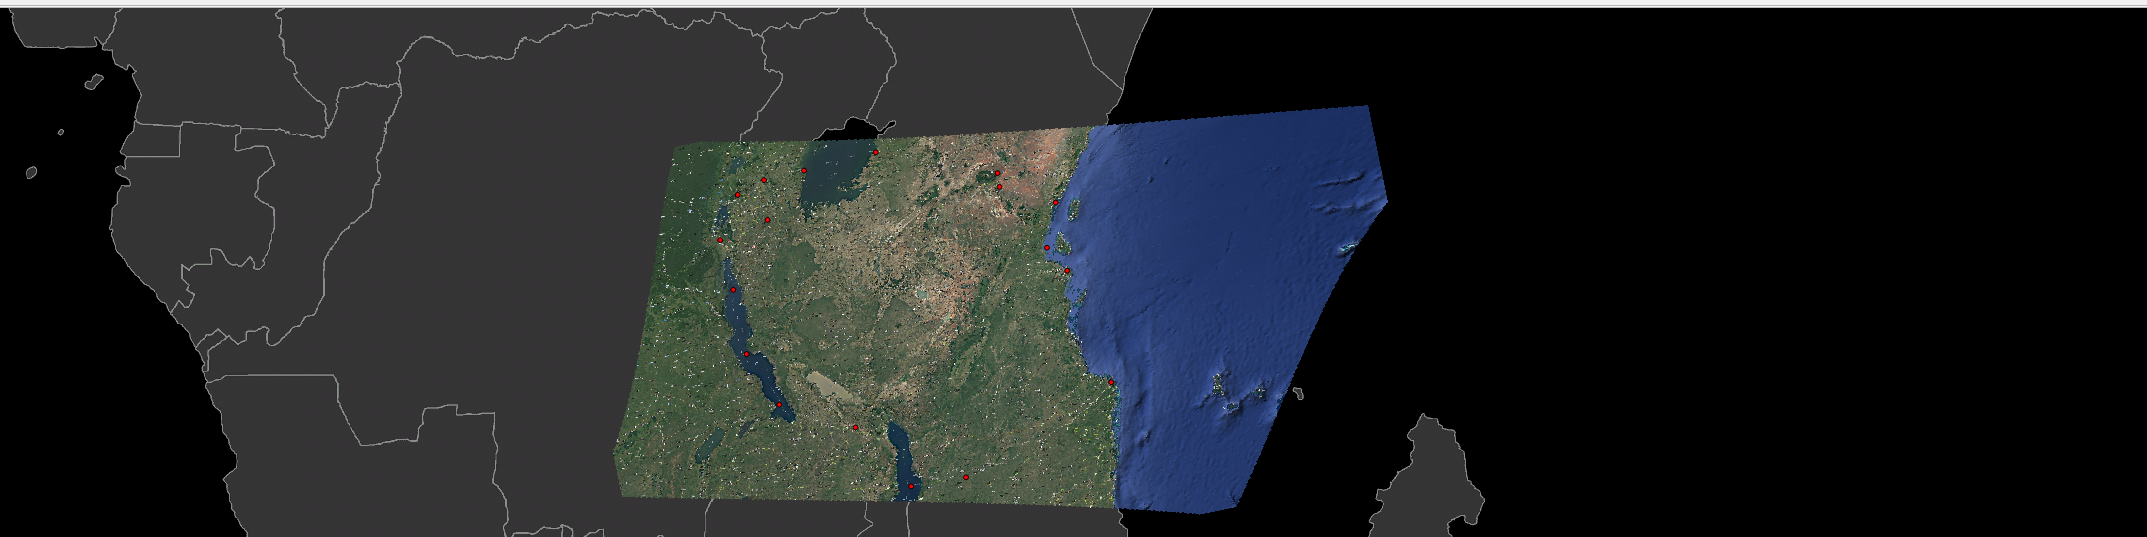 That image will be saved in the location you specified earlier in the menu where we set the Transformation Type.
In the layers list, select the new layer, right-click on it, and choose Properties…, then go to Transparency tab and adjust opacity to see ets map
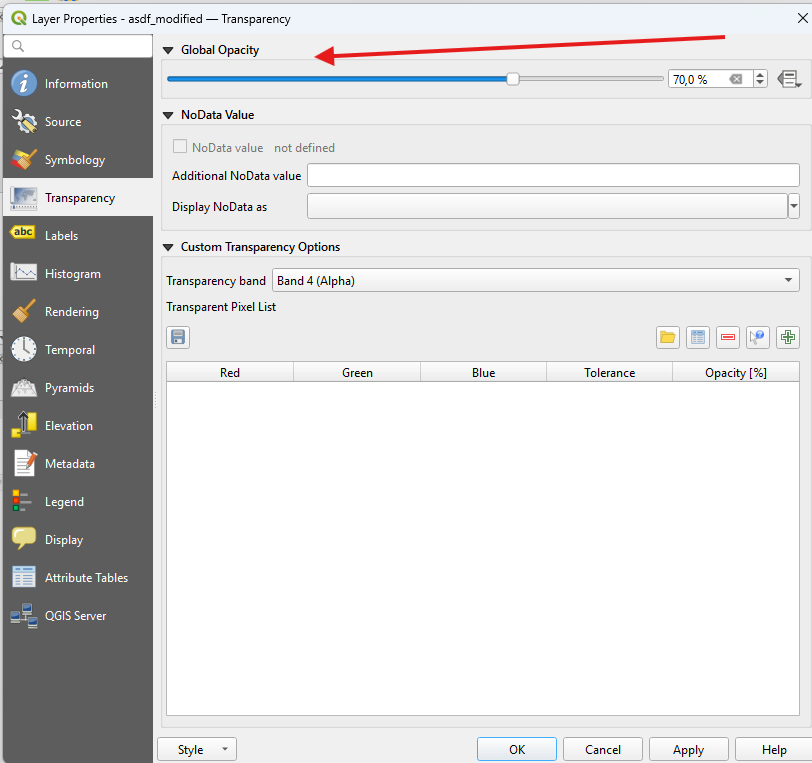
Check that all the borders you marked approximately fit into the ets2 map. If don’t, remove the layer by right clicking and Remove Layer… and move/remake your points.
You now have a transformed map that correctly fits ets2 map background!
Getting dimensions
Right-click the transformed map layer and go to Properties…, then select Information tab and find the Pixel Size:
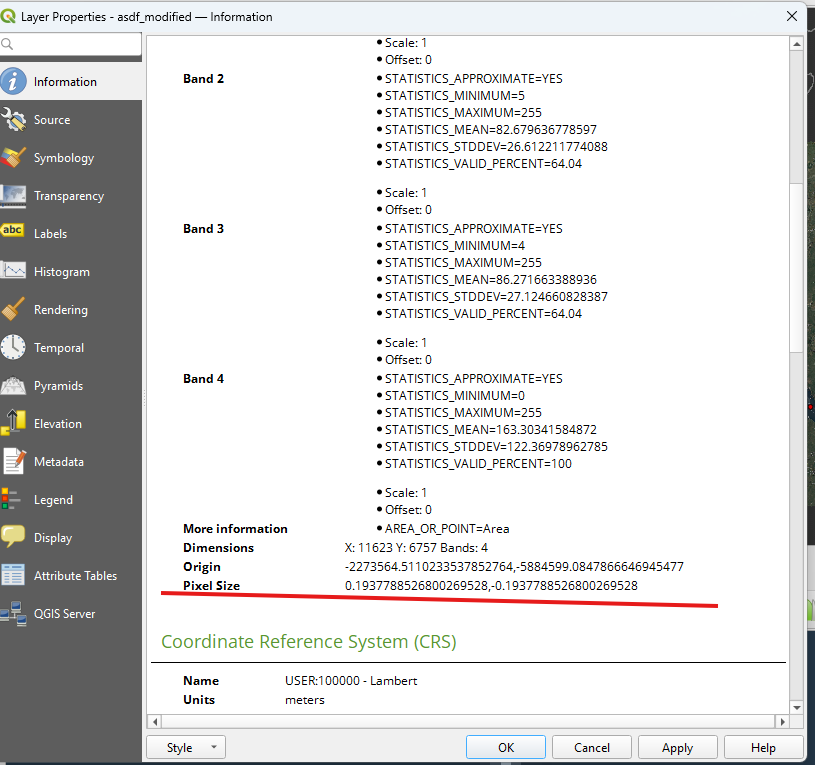
This value is your pixel-to-meter transformation coefficient for X and Y(width and height). Ignore the minus sign in the Y value.
Measuring distance in QGIS
Let’s measure some distance in QGIS to learn how it works.
We’ll measure from Ipole to Kitunda
Press Ctrl + Shift + M or click the ruler icon in the toolbar:

A new window will open:
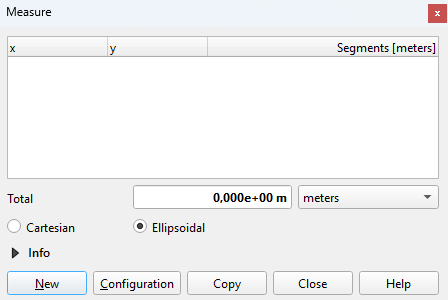 Measuring works exactly the same as in Google Maps. Click to set the starting point of the ruler, then click again to put additional nodes to the ruler.
The data in the table will show measurements for each individual segment of the ruler.
Make sure to change measurement mode to Ellipsoidal if it`s set to Cartesian, to prevent projection distortions.
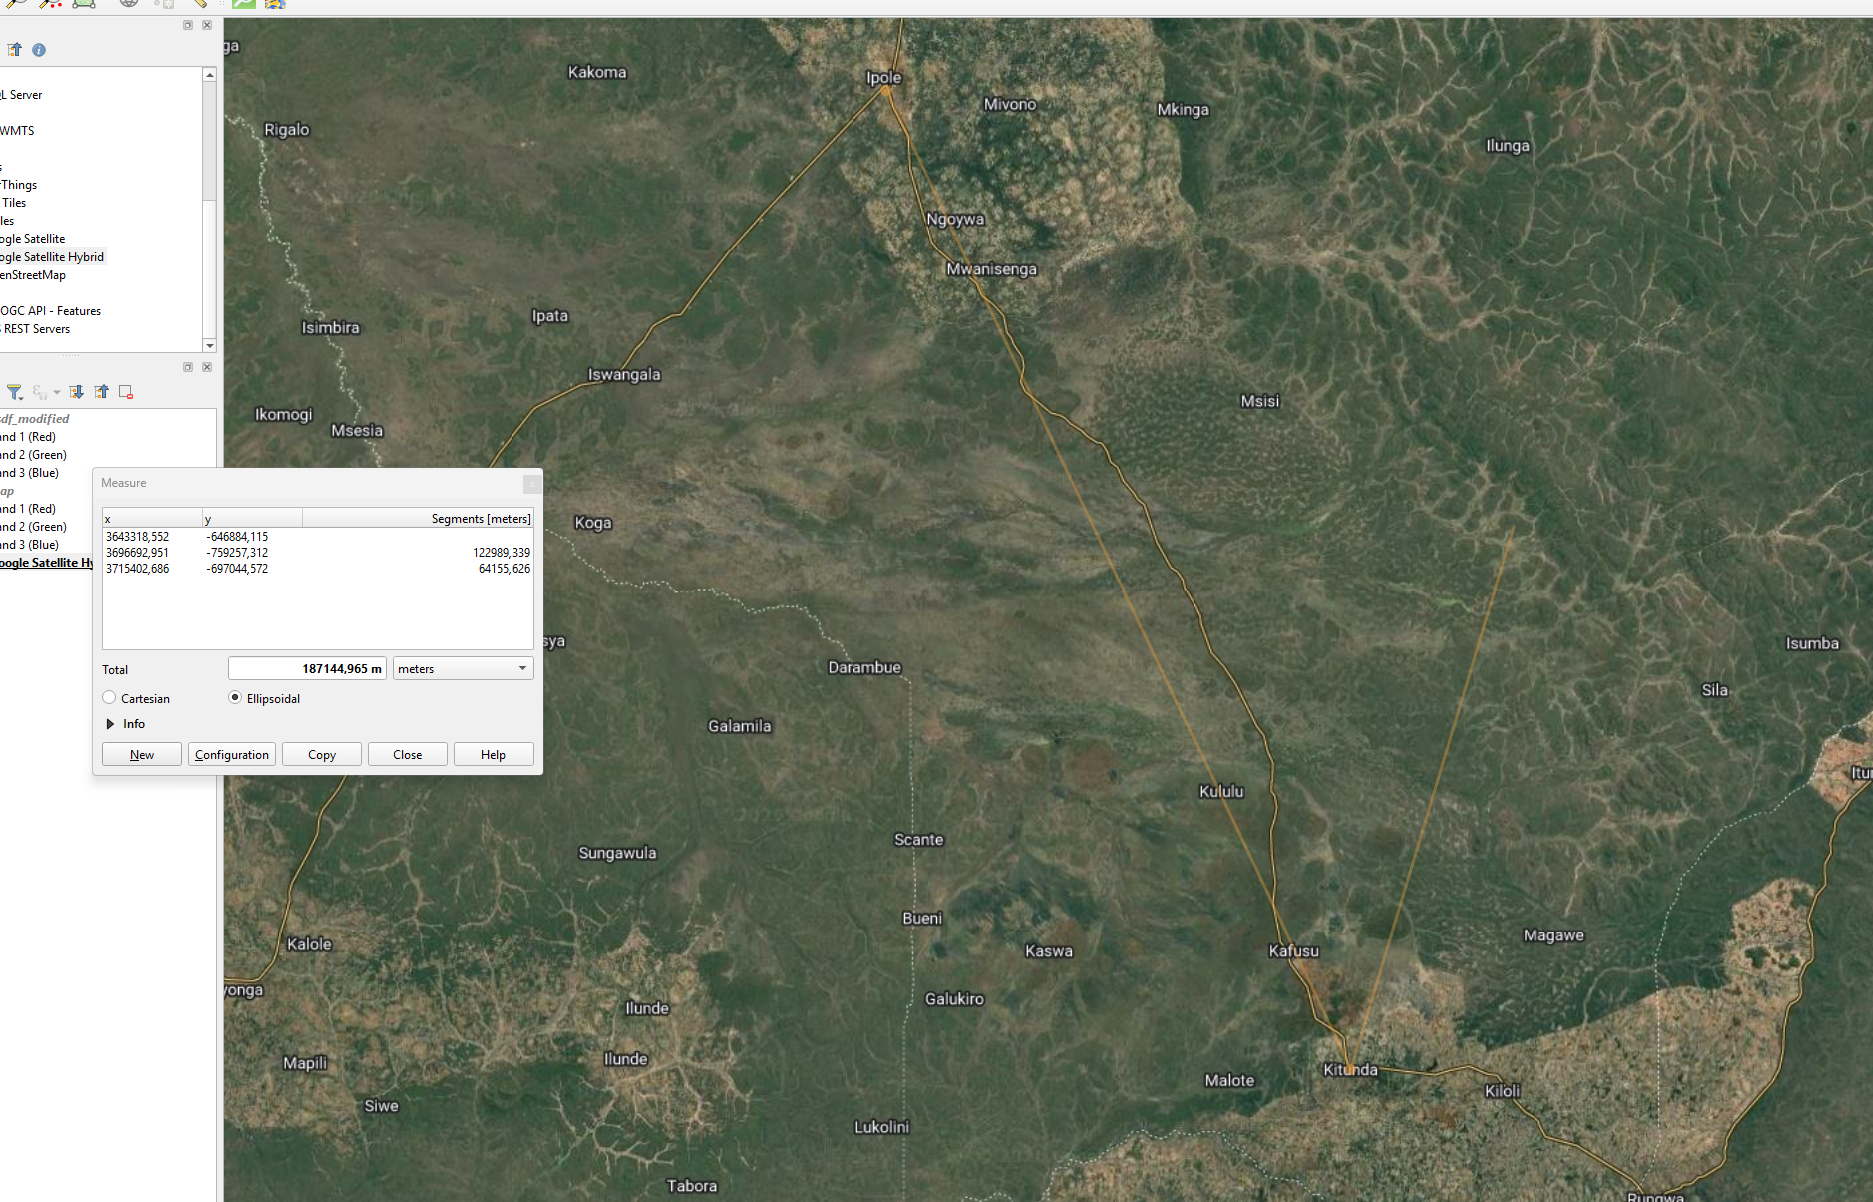 Here we have two sections: one from Ipole to Kitunda in meters, and the second from kitunda to the current mouse position.
Now you know how to measure distances in QGIS. The same measurements can be performed on any other layer as well.
Extracting region in the editor
Import your newly transformed map into your image editor, we already did this for dds, so follow the same process.
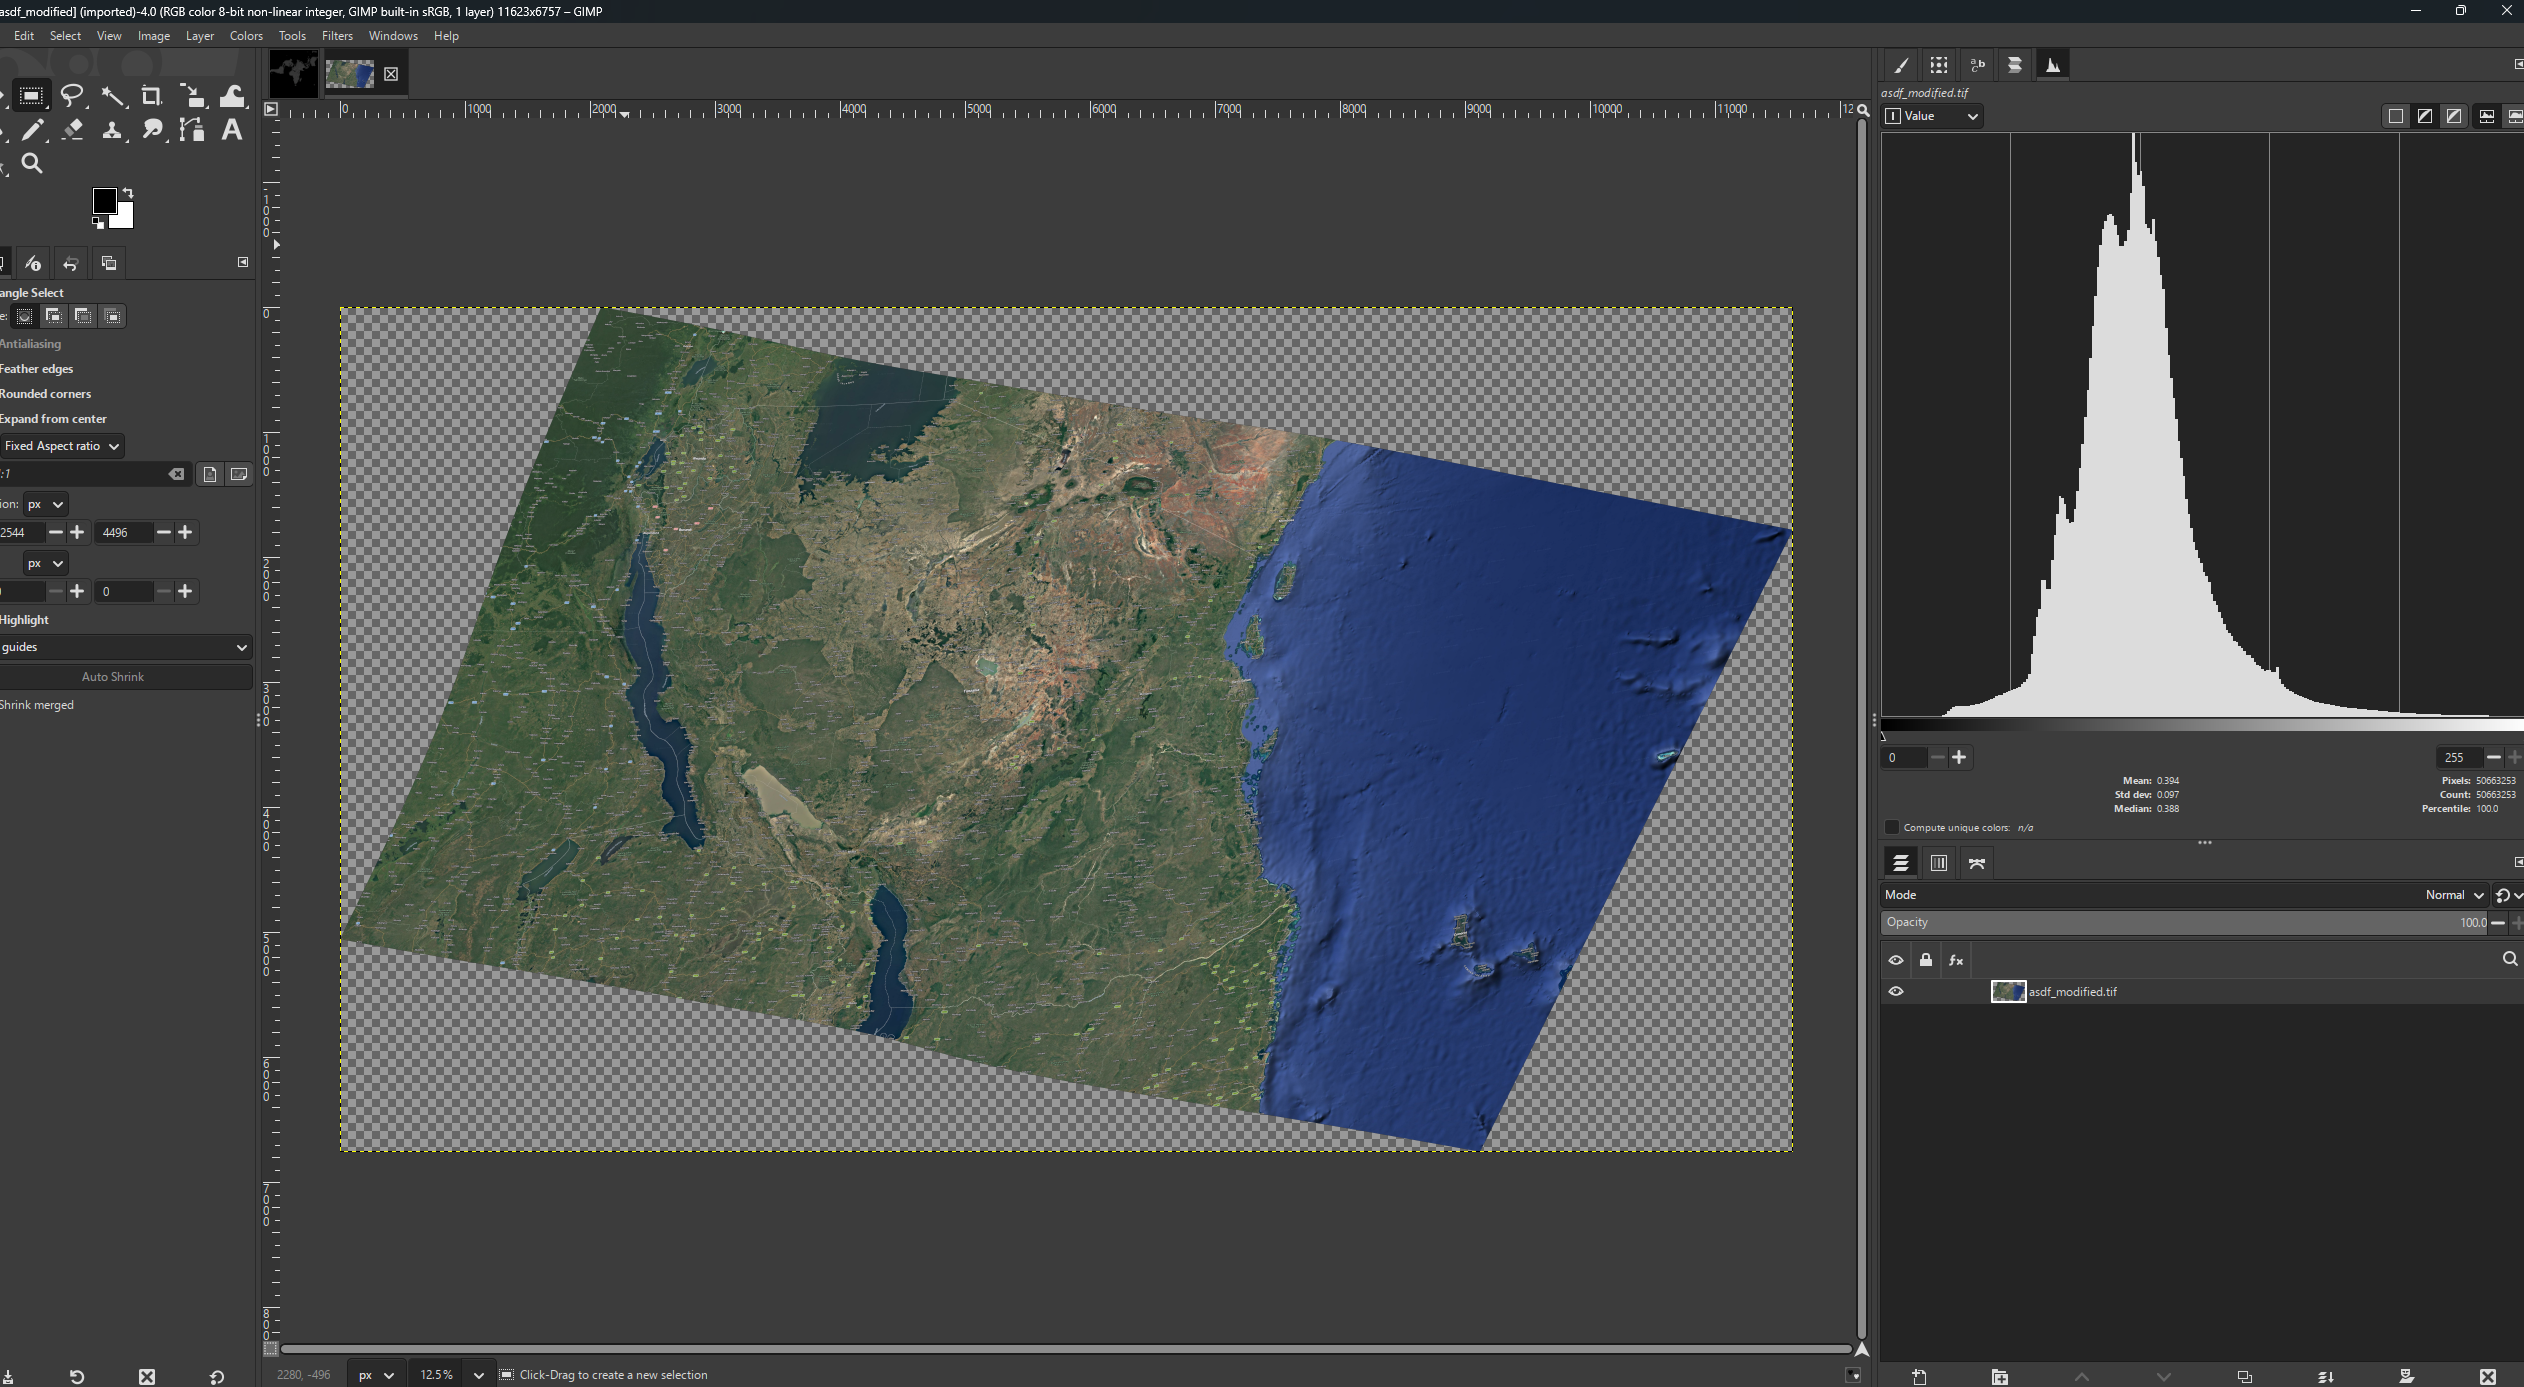
It’s best to use a high-resolution map. Fo reference, mine is 11623x6757
The following steps are for GIMP, but you can do the same in other image editors.
Find a border that you can easily match to the ets2 map. I’ll use this border intersection as an example.
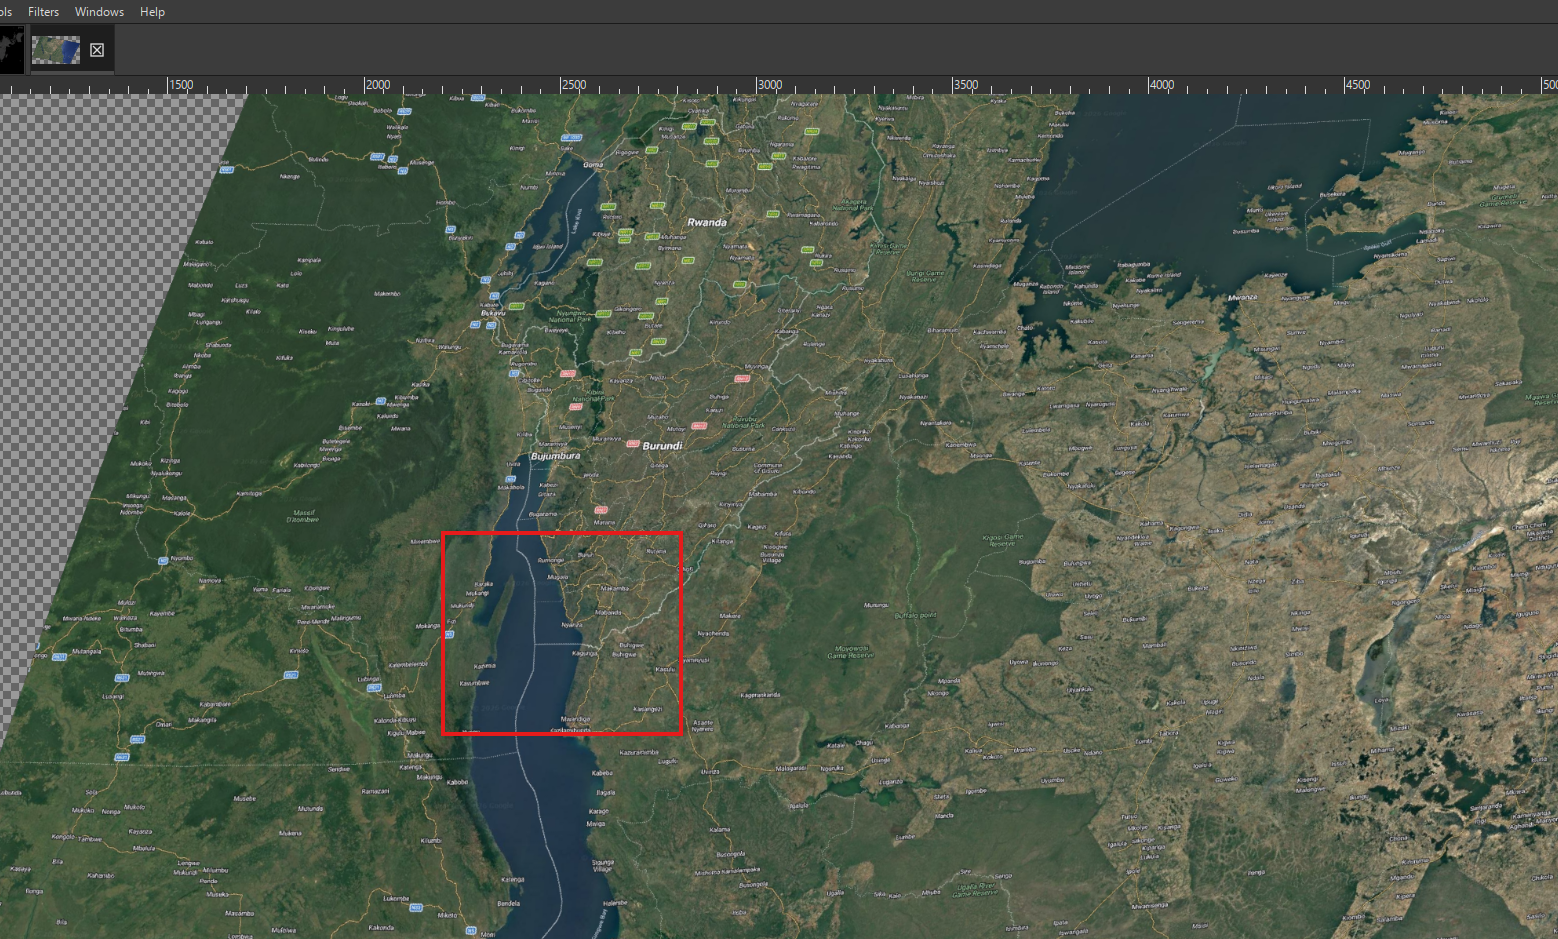
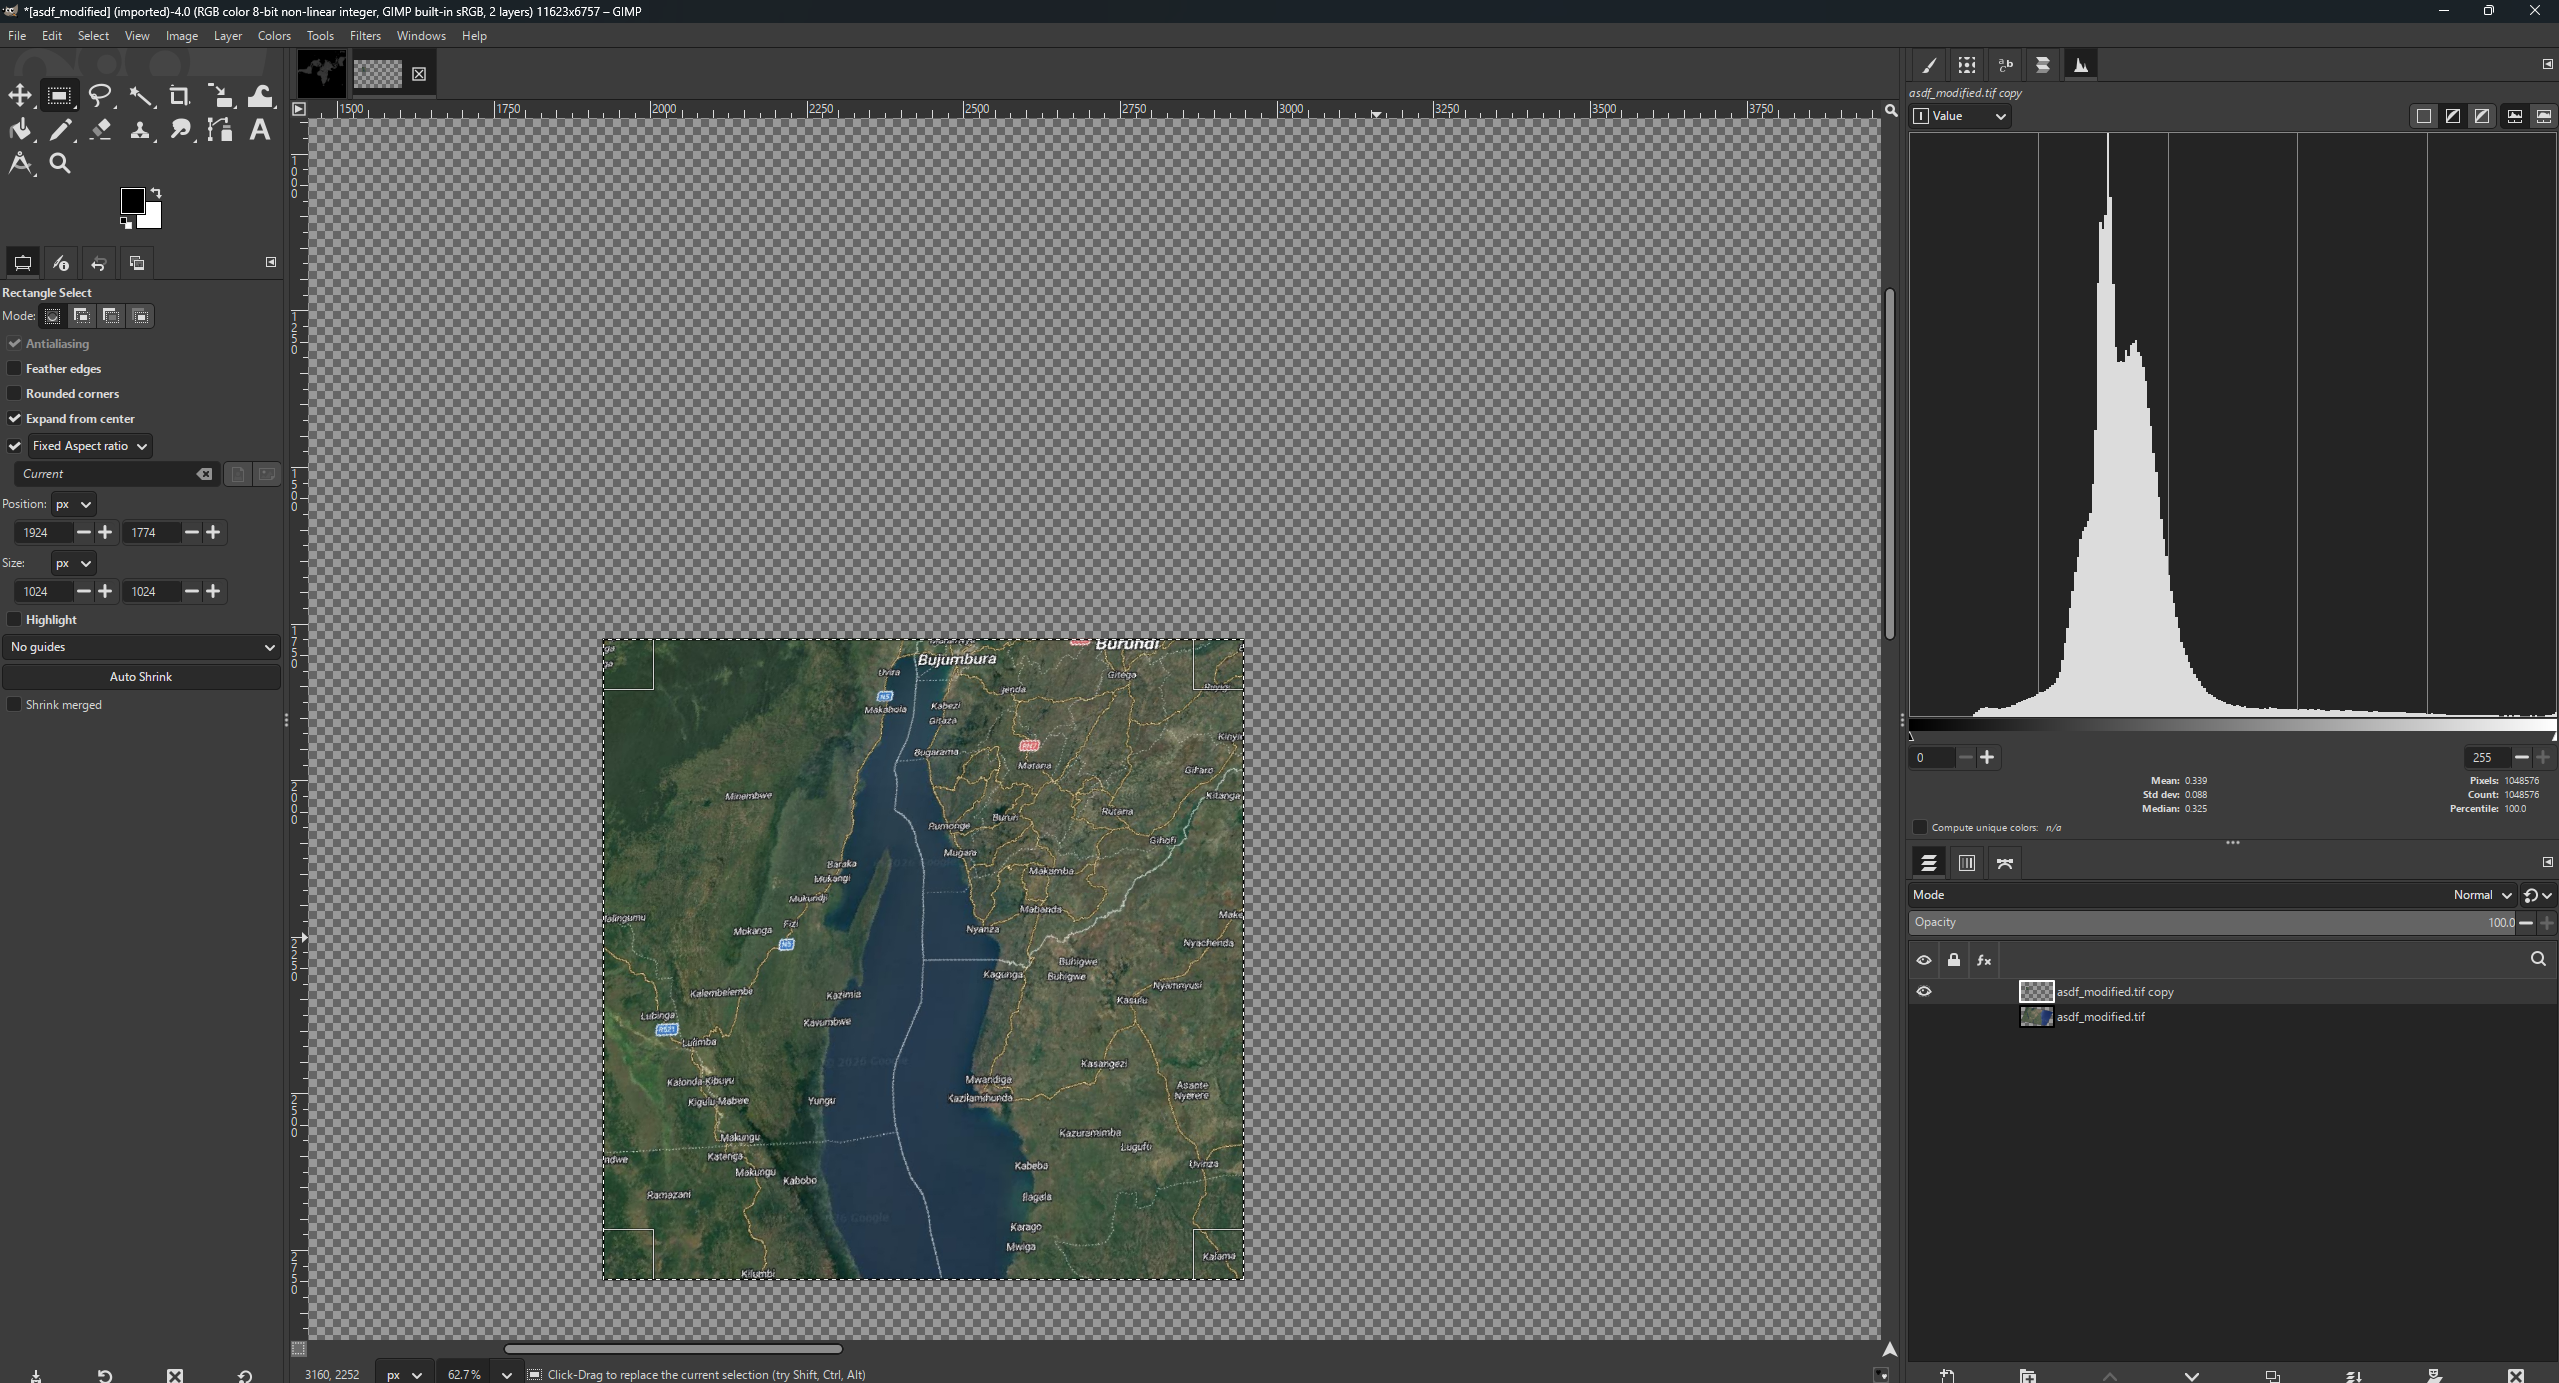
Select the Rectangle Select Tool from the left toolbar. You’ll see the tool option appear:
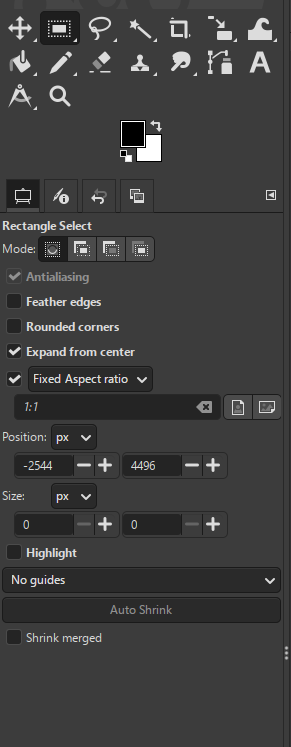
Tick Expand from center and Fixed Aspect ratio, then set the aspect ratio to 1:1.
Your selection will now be a perfect square, expanding from the center point. We need this for easier aligning in the game.
Important: The square size must be a power of 2: 512x512, 1028x1028, etc.
Click on the point where you want the center, then enter the size in the Size in the left toolbar.
Then press Ctrl+C to copy and Ctrl+V to paste - this will create a new layer with your selected contents.
In the layer list, disable your main layers(bottom one) by clicking the check mark.
You should now see something like this:
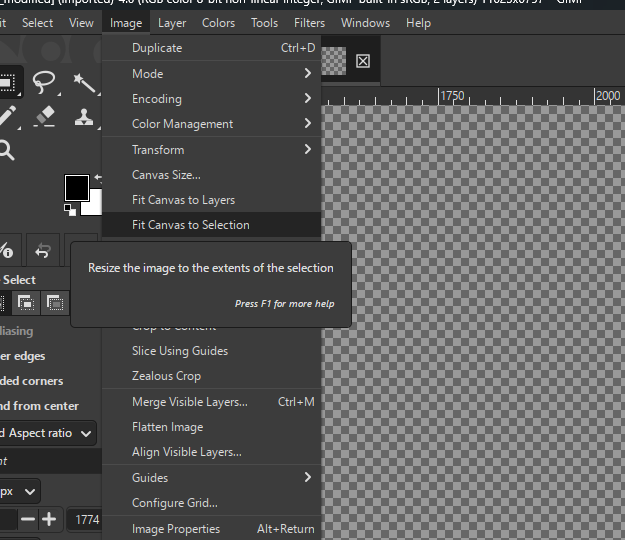
In the top toolbar select Image > Fit Canvas to Selection.
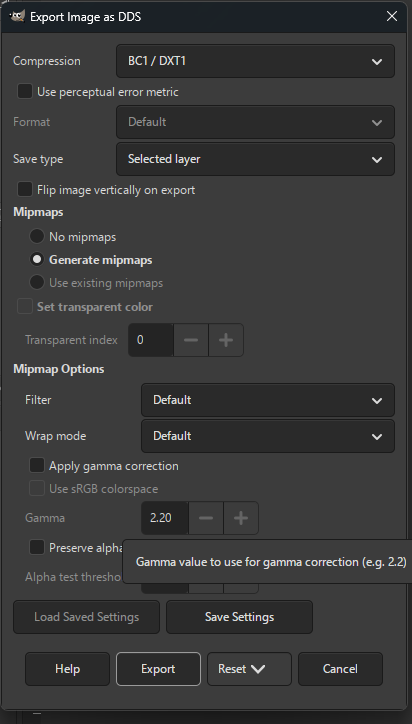
Now we’ll export it as a dds file. We have already done that, but this time in the export settings, tick Generate mipmaps and set compression to DXT1, then click Export.
Now you have the image of your map ready for use.
Getting map real size
We already know pixel-to-meter conversion coefficient, but keep in mind that the meters we get are based on the ets2 map we imported in the QGIS.
To make the map match real-world sizes, we need to adjust the scale.
To do this, measure the distance between two known point on the ets2 map, then measure the same points on the real map. Divide the real distance by the ets2 distance - this will get a coefficient, which you will multiply by yours transformed map image sizes in the next section.
That result can still be slightly off. We’ll address that in the next section.
Ets2 editor background folder structure
As your already know how to use editor, it will create for you a folder named “user_map”. Everything from this point forward will be about that folder.
Create two folders inside of it: def, material
Inside the material folder, create another one named editor - this is where you will put your background textures.
Current structure:
- user_map
- def
- material
- editor
- (yourname).dds
- editor
Editor background structure
You need to download TOBJEditor to create and manipulate .tobj files - these are special files that link images.
You can download TOBJEditor here: TOBJEditor. Click on appropriate exe file to download it.
Now, while being in the editor folder, open the TOBJEditor
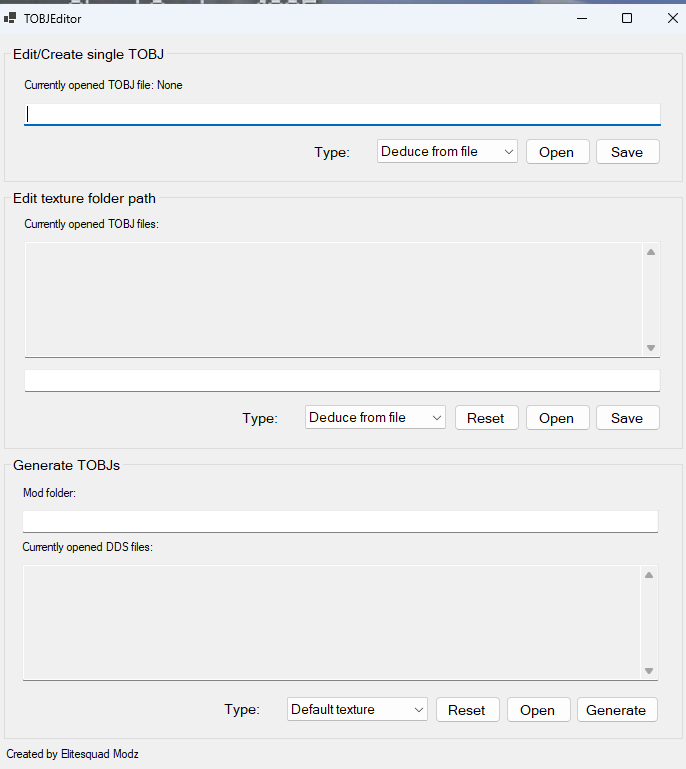
We need Generate TOBJs now.
Click Open and select your dds file, then press Generate. You should now have tobj and dds. However, the tobj file is not correct yet. To fix it, use the Edit texture folder path, open the tobj file you just created
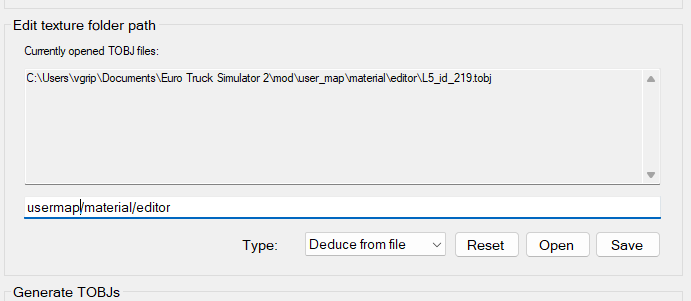 You will see something like that, we need to remove anything before “material/editor” and then press Save
Now tobj is correct
Current folder structure:
- user_map
- def
- material
- editor
- (yourname).dds
- (yourname).tobj
- editor
Now we need to create the mat file. In the editor folder create one file, named as (yourname).mat
Open the file and paster the following into it, make sure you replace (yourname) with your name
material : "dry.tex"
{
        texture : "(yourname).tobj"
        texture_name : "texture"
}
Current structure:
- user_map
- def
- material
- editor
- (yourname).dds
- (yourname).tobj
- (yourname).mat
- editor
Now we go into def folder and create file named editor_data.sii
Current structure:
- user_map
- def
- editor_data.sii
- material
- editor
- (yourname).dds
- (yourname).tobj
- (yourname).mat
- editor
- def
Open the file and paster the following:
SiiNunit
{
editor_data : .edit_data {

	autosave_interval: 15 #minutes
	autosave_notify_interval: 15 #seconds

	startpos_model: "/model2/editor_start_model.pmd"
	startpos_rotate_speed: 2.0

	stamp_count_warning: 40
	road_length_warning: 330

	sub_mode_types[]: 39 #bezier patch"
	sub_mode_types[]: 2  #buildings_item"
	sub_mode_types[]: 45 #camera_path_item"
	sub_mode_types[]: 23 #camera_point_item"
	sub_mode_types[]: 12 #city_item"
	sub_mode_types[]: 44 #curve_item
	sub_mode_types[]: 8  #cut_plane_item"
	sub_mode_types[]: 46 #cutscene_item"
	sub_mode_types[]: 43 #far model"
	sub_mode_types[]: 19 #ferry_item"
	sub_mode_types[]: 13 #hinge_item"
	sub_mode_types[]: 42 #map_area_item"
	sub_mode_types[]: 18 #map_overlay_item"
	sub_mode_types[]: 5  #model_item"
	sub_mode_types[]: 9  #mover_item"
	sub_mode_types[]: 11 #no_weather_item"
	sub_mode_types[]: 4  #prefab_item
	sub_mode_types[]: 3  #road_item
	sub_mode_types[]: 36 #sign_item"
	sub_mode_types[]: 21 #sound_item"
	sub_mode_types[]: 1  #terrain_item
	sub_mode_types[]: 38 #traffic_area_item"
	sub_mode_types[]: 41 #trajectory
	sub_mode_types[]: 34 #trigger_item"

	map_import_offset: (-43402, 0, -28089)

	background_map_height : 0.01

	bcg_map_name[]: "/map/europe.mbd"


	bcg_material[]: "/material/editor/(yourname).mat"
	bcg_size_x[]: 26076.94
	bcg_size_y[]: 26076.94
	bcg_offset_x[]: 132673.78
	bcg_offset_y[]: 347683.25


	##############################


# For INTERNAL members: Please for added custom map use "/mod_internal/base/def/editor_data_custom.sii".
# This one below going to be overriden.

# For MODERS: Custom maps should be added to file below.
@include "editor_data_custom.sui"

}
}
bcg_map_name - this ie the map that will use your background(most of the times it will be europe.mbd, but if you want standalone name it as you name your map)
bcg_material - your mat file from matrial/editor
bcg_size_x, bcg_size_y - the dimensions of your map in meters, scaled to ets2 sizes. In-game scale is 19.
bcg_offset_x, bcg_offset_y - the offset coordinates to position your map correctly. These place the center of your map at the specified coordinates. This is why we do selection from the center in GIMP.
Now we put bcg_size’s as we calculated from QGIS data, but remember to divide them by game scale, if you are expanding game map.
For offset, enter some arbitrary values currently and load the editor.
In the editor, open the UI map(F8) and move yourself so that you are exactly(or at least very very close to) the reference point that you placed as the center earlier(i chose a border intersection).
Once you’ve aligned it, remember to tick Background map. For finer adjustments zoom in and move around.
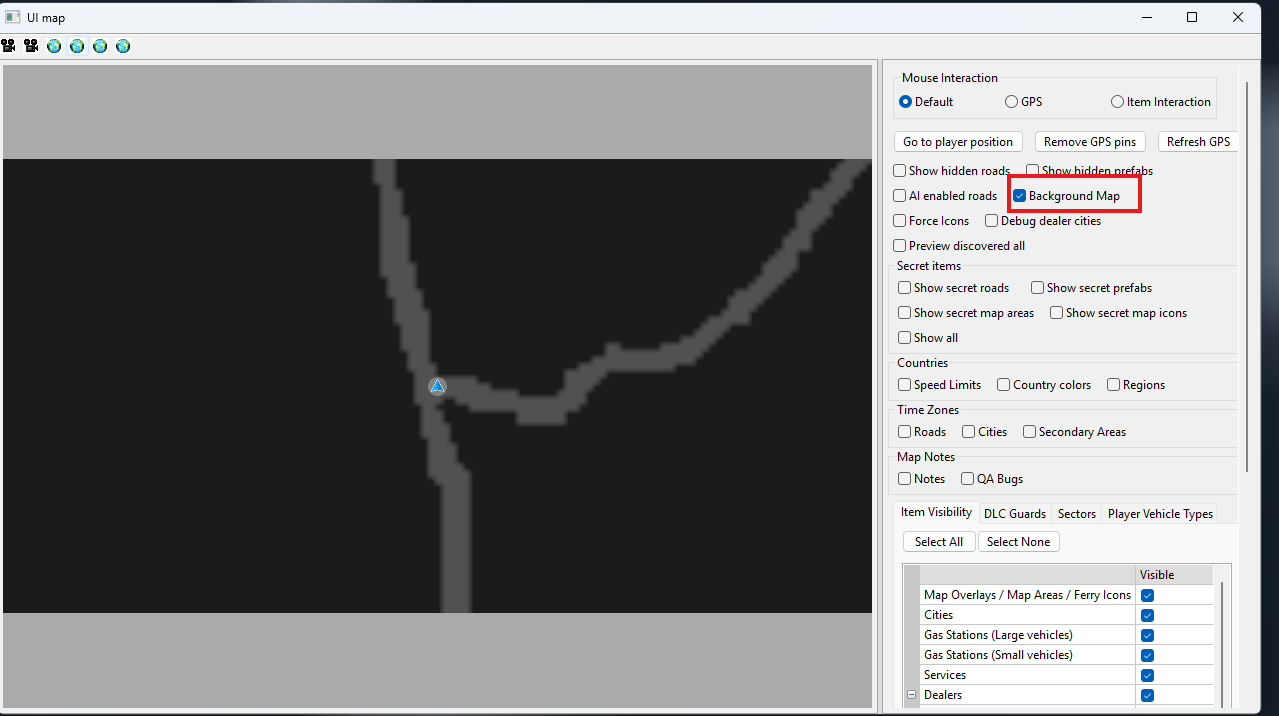
When your are satisfied, open the console with ~ and type goto 0;0;0. This will tp you to 0, 0, 0, but that’s’ not our goal, you will get Last camera placement coordinates in the form of X;Y;Z .
Copy those coordinates with two decimal digits into your bcg_offset. bcg_offset_x is X, bcg_offset_y is Z.
Your map is now aligned to the world and the ets2 background. To return to where you were, simply type goto X;Y;Z with the coordinates from Last camera placement.
To measure distance and correct any remaining inaccuracies, use the ruler tool:
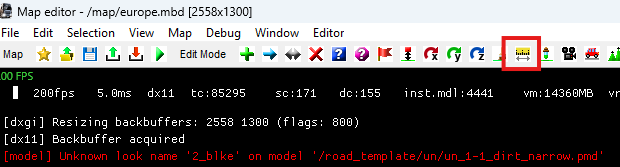 Click on two known points and compare that to QGIS or Google Maps, or whatever maps. Make adjusments accordingly.
You must reopen editor after any change to the editor_data.sii
Check the alignment by moving along the borders in the editor and observing your map. If you don’t see your map at your offset, press A untill it appears, aling with the models, road, etc.
And here your go, after that you have your map and you can do what you want with it: Map, expand, fix other maps.
Credits & Acknowledgments
This guide was created by Naneless.